Saturday, October 30, 2010

Happy Halloween Marshmallow Frosted Brownie Bites


My husband is having a Halloween potluck lunch today and work.  I guess some of the girls in Accounting requested my Halloween marshmallow cream brownies they tasted a couple of weeks ago. 

This recipe is an easy one since it uses boxed brownie mix.  Honestly, I haven't found a homemade brownie recipe that creates a good chewy fudge brownie.  But I do enjoy homemade light and fluffy brownies every now and then too.  Try out these Nestle Toll House Brownies.

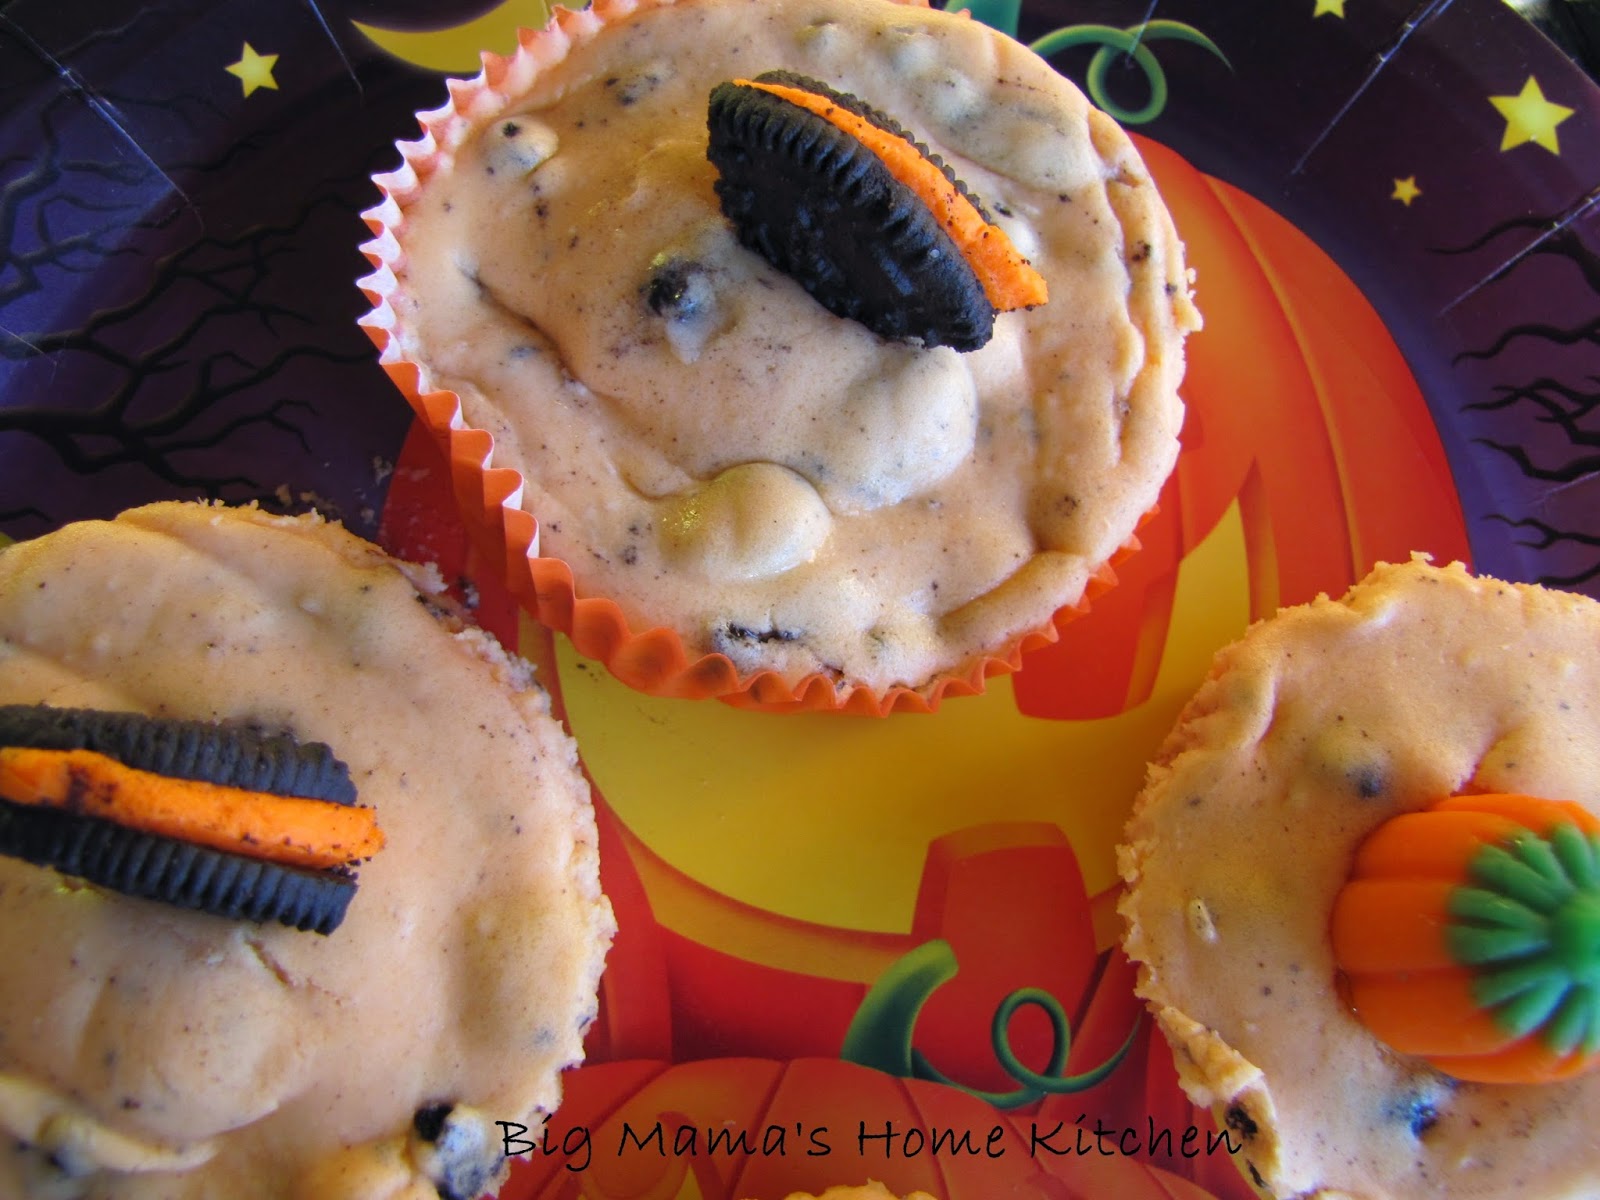
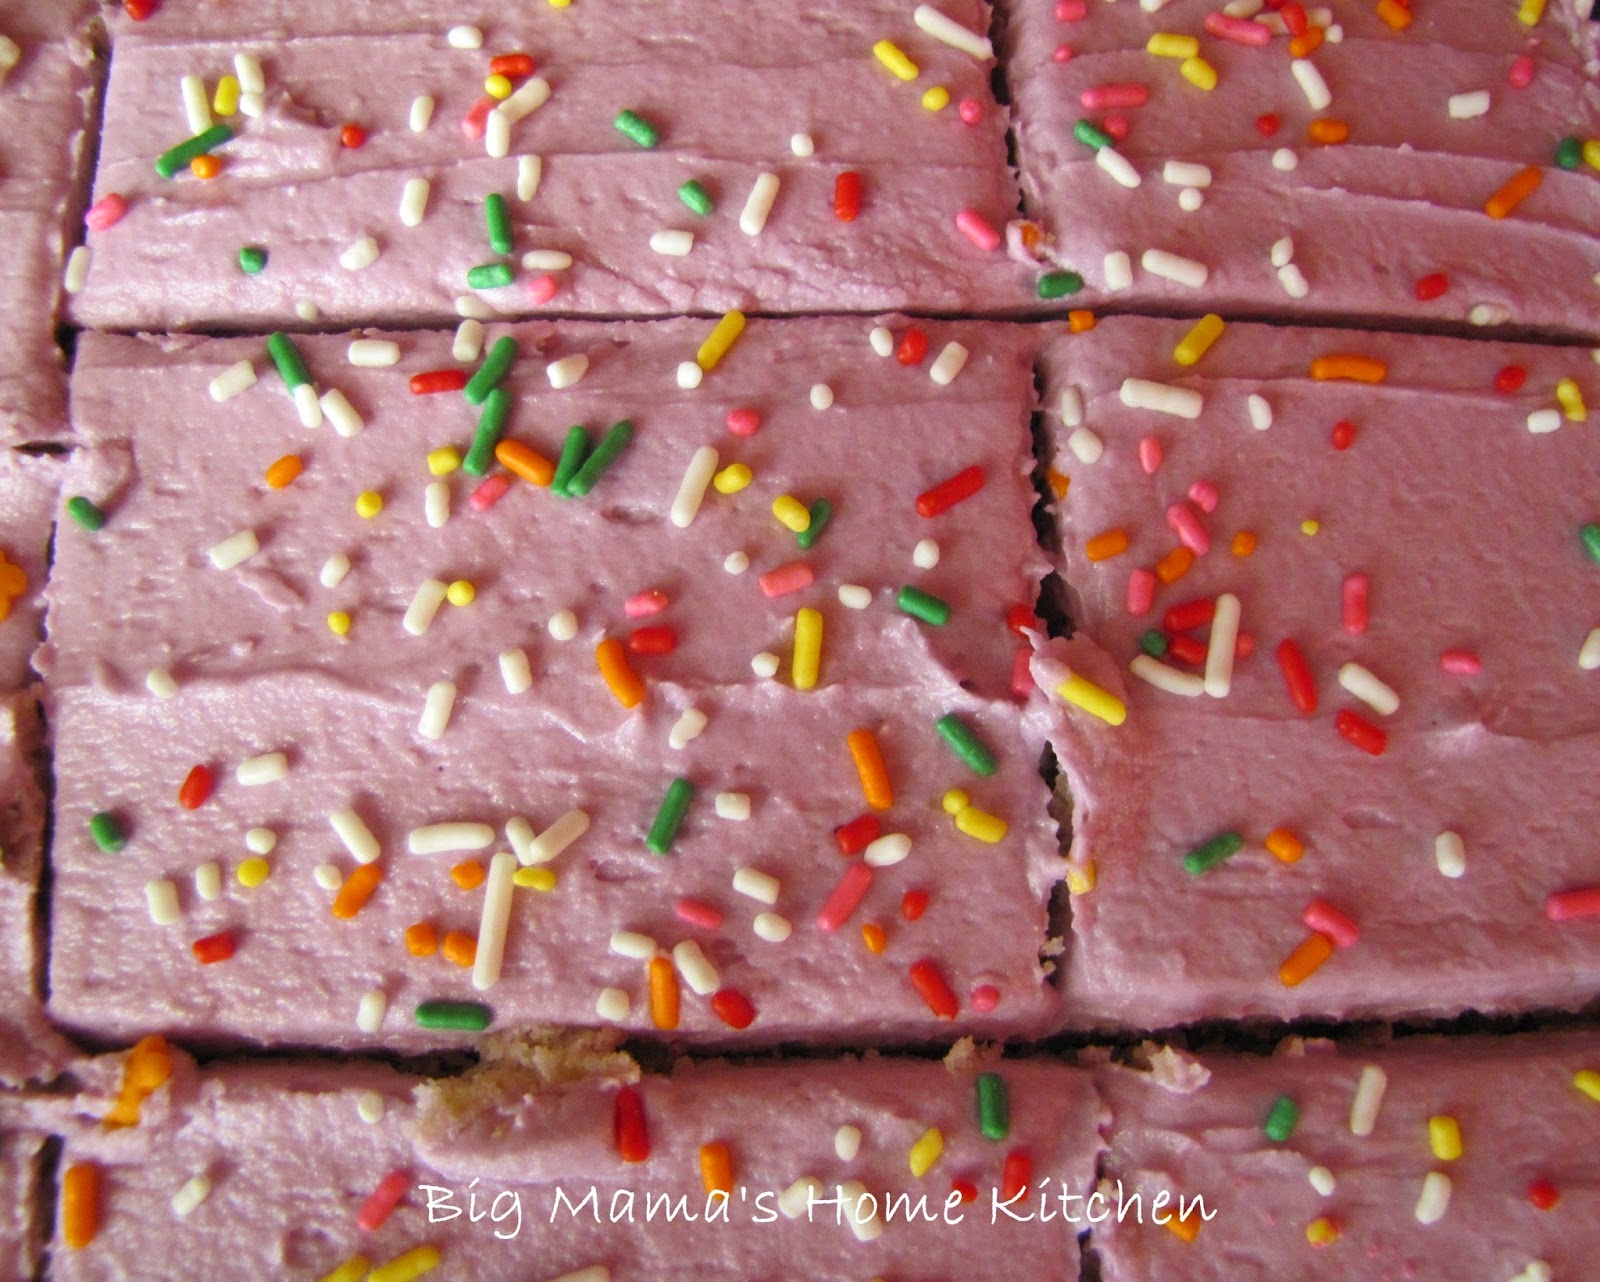
I thought it would be great to bake the brownies in mini cupcake tins so everybody gets a good little bite...you know...the chewy outside edge and the fudgy inside.  I tried to mix an orange colored frosting, but it looks more like peach.  I'm definitely getting some of those cool gel color tubes from the store in every color under the rainbow for my next festive baking project.  I also added some festive spider mix Halloween sprinkles I found at the store.

Brownie Ingredients:

1 box Duncan Hines Chewy Fudge brownie mix
2 eggs
1/4 cup water
1/2 cup oil

Preheat oven to 350 degrees. Prepare brownie mix per box instructions.

Spray the mini muffin tins with non-stick cooking spray.  This recipe makes about 30 mini brownie bites.  Pour your brownie batter into a large liquid measuring cup with a spout.  Fill each muffin tin 3/4 of the way full.  Bake for 12-14 minutes, or until toothpick comes out with just a little fudgy brownie sticking to it.  You don't want to overbake these or they will be very dry.

Let the brownies cool completely in pan on cooling rack.  While your brownies are cooling, you can make the marshmallow frosting.

Marshmallow Frosting Ingredients:

1/2 stick butter, softened (4 Tablespoons)
7 1/2 oz. marshmallow cream (small jar)
1 tsp vanilla
2 C powdered sugar
1-2 T milk
Sprinkles

In a medium sized bowl, use a hand mixer to beat together the butter, marshmallow cream, and vanilla until smooth and creamy. Gradually add in the powdered sugar. Add 1 T milk and beat until combined. Add more milk as needed until you get a good consistency (thicker is best).

Use a large spoon to drop a big dollop of frosting in the center of each cooled brownie bite.  Let it run down the sides.  Sprinkle on toppings before it sets up.  This frosting sets up quickly...I learned this the hard way and had to add even more frosting so they would all have sprinkles.  Enjoy!

Friday, October 29, 2010

Happy Halloween Mini Oreo Cheesecakes


My family seriously can't eat cheesecake without "uuuummmm" ing until they finish the very last bite.  I make a few different cheesecakes, but usually save them for special occasions or family get togethers.  When I saw these cute orange Halloween cheesecakes over at Tasty Kitchen last week, I just knew that I had to make them for the weekend.  This recipe originally came from  Martha Stewart's Cupcakes cookbook...I need to buy a copy of this as I'm sure there are many other cupcake recipes just as good that my family would love to try. 

This recipe makes 15 cupcake size cheesecakes.


Ingredients:

15 whole Halloween Oreo cookies
6 Halloween Oreo cookies, coarsely chopped
1 lb cream cheese (2 blocks Philadelphia cream cheese)
1/2 C white sugar
1/2 tsp vanilla extract
2 eggs, room temperature, lightly beaten
1/2 C sour cream
Orange food coloring (or be brave and mix your own)

Preheat oven to 275 degrees.  Line a cupcake tin with cupcake liners.  There are several festive Halloween cupcake liners at Wal-Mart.

Place a Halloween Oreo in the bottom of each cupcake liner with the "Oreo" side up and the Halloween picture on the bottom.  That way, you can see the picture on the bottom when you remove the liner before you eat it.


In a large mixing bowl with a paddle attachment, beat the cream cheese on medium speed until smooth.  Gradually add the sugar and continue to mix until the sugar dissolves.  Add in the vanilla extract.  Gradually add in the eggs, letting it mix after each addition.  Add the sour cream and mix until well incorporated.  The mixture should be smooth, light, and fluffy.  Add in the food coloring and mix until you get the color just right. 

Remove the mixing bowl and add the chopped Oreo pieces.  Stir to combine.  Use an ice cream scoop to fill each cupcake liner almost to the top. 

Bake for 22 minutes, rotating the pan halfway through the baking time.

Allow the cheesecakes to cool in the pan on a cooling rack.  Carefully remove the cheesecakes from the cupcake tin and place in an airtight container.  Refrigerate for at least 4 hours before serving.  They are even better when left overnight as they will set up better. Garnish with additional Oreos before serving. Enjoy!

Wednesday, October 27, 2010

Mini Donut Muffins


My girls will eat any doughnut you give them...my little Jordyn prefers glazed donut holes.  I can please them all with this simple recipe.  I bookmarked a recipe for doughnut muffins posted by Cooking with K.  I knew as soon as I saw the name that I had to make these...then I saw the picture...yummy!  I decided to make these in mini muffin pans so they are more like little donut hole bites.  See...they look like doughnut holes here...


I rolled some of the doughnut muffins in a cinnamon/sugar mixture and the others in a vanilla glaze.  Next time, I'm going to try a chocolate glaze, blueberry glaze, and strawberry glaze.  We have so many favorite doughnuts...the topping choices are really endless.  Whatever you like can be made into a glaze.  You can also use nuts, sprinkles, coconut, mini candy pieces, etc.  I think vanilla bean sugar would be amazing too!  My favorite doughnuts are apple fritters, so I could add diced apples to the muffins and then roll them in cinnamon vanilla glaze to recreate these.

This recipe makes 24 mini doughnut muffins, and I had enough batter left for 2 regular size muffins too!  I just made a few minor changes to the original recipe.

Ingredients:

1/3 C Canola oil
3/4 C white sugar
1 egg
3/4 C milk
1 tsp vanilla extract
1 3/4 C cake flour (or all purpose flour)
1 1/2 tsp baking powder
1/4 tsp salt
1/2 tsp cinnamon

Cinnamon/Sugar Topping:
4 T melted butter
1/4 C white sugar
1 tsp cinnamon

Vanilla Glaze:
1 C powdered sugar
1/2 tsp vanilla extract
2 T milk

Preheat the oven to 350 degrees.  Spray a mini muffin pan with non-stick cooking spray. 

In a mixing bowl, add oil, sugar, egg, milk, and vanilla extract.  Beat for 1 minute.

Sift together the flour, baking powder, salt, and cinnamon.  Add to the wet ingredients.  Mix for another minute until combined and there are no more lumps.

Pour batter into a large liquid measuring cup with a spout.  Fill the muffin tins 3/4 of the way full.  

Bake for 9 minutes until puffed up and firm to the touch.

For the toppings:

Put the melted butter in a bowl.  Put the cinnamon/sugar in a separate bowl.  Dip each muffin top in the butter, then roll the entire muffin around in the cinnamon/sugar mixture.  Set aside.

Mix together the powdered sugar, vanilla, and enough milk to make a glaze in a bowl.  Dip each muffin in the glaze and roll around on all sides.  Set aside to let the glaze firm up.  Enjoy!


Saturday, October 23, 2010

Mini Pineapple Upside Down Cakes


YUM...brown sugar topping with pineapples and cake...brings back so many childhood memories.  My mom made the best pineapple upside down cake.  She would always use a cast iron skillet so the topping was nice and caramelized on top.  This is my mom's tried and true recipe.  I just used muffin tins instead of a cast iron skillet. 


I really like individual little desserts.  My girls can easily help themselves and they look pretty fancy.  I decided to try this recipe using jumbo muffin tins and regular muffin tins.  This recipe will make a batch of 6 jumbo size or 12 muffin size cakes.


Cake Ingredients:

2 eggs
2/3 cup white sugar
4 Tbsp pineapple juice
2/3 cup all purpose flour
1 tsp baking powder
1/4 tsp salt

Topping:

1/4 cup butter (1/2 stick or 4 Tbsp)
2/3 cup brown sugar (packed)
1-can pineapple rings
6-maraschino cherries

Preheat oven to 350 degrees.  Spray your muffin tins with non-stick cooking spray. 

In a mixing bowl, add eggs, white sugar, and pineapple juice.  Beat for 2 minutes.  In a separate bowl, sift together the flour, baking powder, and salt.  Add to the wet ingredients and turn mixer back on for 2 minutes. 

In a small sauce pan, melt the butter and add the brown sugar.  Stir on low heat for one minute.

Spoon a layer of the warm brown sugar mixture into the bottom of each muffin tin, then place a pineapple ring on top.  Add a cherry in the middle of each pineapple.    Pour cake mixture over to fill muffin tin 3/4 of the way full.  If you are using regular muffin tins, you will need to cut down the rings to fit or just use pineapple tidbits.


Bake jumbo cakes for 25 minutes.  Bake regular cakes for 20 minutes.  If you choose to make a large cake, bake for 22-25 minutes in a 10 inch cast iron skillet.  The cake is done with a toothpick inserted in the middle comes out clean.


This is the hard part...waiting for warm cakes to finish baking.  


Remove from the oven.  Let cool in pan for 3 minutes.  Run a knife around the edge of each cake to help loosen in case it sticks a little.  Place a wire cooling rack on top, and quickly flip over on top of sheet tray to catch extra drippings. 


Place wire rack of cakes on sheet tray to cool. 


Now it's time to Enjoy!   


Friday, October 22, 2010

Piggies In A Blanket


Have you forgotten about these little piggies?  They would be great to snack on while cheering for your favorite Football team this weekend or during family game night.  These little snacks have been out there for a long time, and I'm sure many of you have made them or eaten them.  We make these little piggies often.  They are a simple kid friendly snack or quick appetizer for a party.  Taylor loves being in the kitchen helping me.  The past few times, she has made these all by herself.  I simply cut the dough and cheese, and put them in the hot oven for her.  She's a piggy making pro and was very proud of her masterpiece today!  Her sisters chowed down on these snacks and probably won't be hungry for dinner.  The recipe is only 3 ingredients, and by the time the oven heats up, the piggies are ready to bake. 

Ingredients:

1 tube refrigerated Crescent dough
4 slices American cheese, cut into four pieces
16 Little Smokies

Preheat oven to 350 degrees. 

Cut the dough triangles in half from smallest side tip to opposite end.  You will end up with 2 long triangles.  Place a piece of cheese and sausage on the wide end.   

Roll up from bottom to top

Check out the double roll action...

Place on a non-stick baking sheet.  Bake for 15-18 minutes until golden brown. 

Serve with honey mustard and Buttermilk Garlic DipEnjoy!

Chicken Cacciatore


This is my first attempt at Chicken Cacciatore.  I've been wanting to make this dish for a while now.  My husband is Italian and didn't know what it was...you see, he's more of a meat lover, and will only occasionally eat chicken.  My daughter's school published a cookbook last year.  They collected recipes from moms/grandparents/friends and then sold them as a fundraiser for the school.  This recipe is from my friend Marie.  Our girls have known each other for a long time and played on the same softball team.  Thanks Marie for a great recipe!  It was a big success with my husband and girls...yea!!!

Ingredients:

1/4 cup all purpose flour
1 1/4 tsp kosher salt, divided
3/4 tsp black pepper, divided
1 whole cut-up chicken
1/4 cup olive oil
2 T butter (optional)
1 white onion, chopped into large pieces
1 cup baby carrots
1 stalk celery, sliced
4 cloves garlic, minced
8 oz. fresh mushrooms, sliced (optional)
3 sprigs fresh thyme
1-2 bay leaves
1-28 oz. can Italian diced tomatoes
1/3 C dry red wine
1 can low sodium chicken broth (optional)
1/4 C flat leaf parsley, chopped
1 lb linguine noodles

Preheat the oven to 350 degrees.

Combine the flour, 1/2 tsp salt, and 1/2 tsp pepper in a shallow dish.  Rinse the chicken and pat dry.  Lightly coat the chicken in the flour mixture, shaking off any excess.  Heat oil and butter in a large dutch oven or stock pot over medium high heat.  Add the chicken in batches and cook 4 minutes per side. 


Remove to a plate and set aside for later.  After all the chicken is browned, add the onion, carrots, celery, mushrooms, garlic, thyme, and bay leaf.  Cook for 10 minutes, stirring occasionally. 

Add the tomatoes, wine, chicken broth (if using) and remaining salt and pepper.  Cover and bring to a simmer.  Turn off the heat and transfer to the oven.  Cook for 1 hour.  

While the chicken is cooking, you can cook your pasta.  I used Barilla linguine noodles.  Cook in boiling salted water until partially cooked through, about 5 minutes.  Drain and toss in olive oil.  Set aside.

After an hour, remove the chicken cacciatore from the oven and transfer the chicken to a plate.  Put the pot back on the stove top over high heat and add the partially cooked linguine noodles (or your pasta of choice).  Finish cooking the pasta in the cacciatore mixture.  Use tongs to place cooked noodles on large serving platter.  Add the chicken on top and as much of the cacciatore sauce as you like.  We like ours really saucy as you can see!  Enjoy!

Thursday, October 21, 2010

Buttermilk Garlic Dressing/Dip


I grew up in the North Dallas area where there were so many great restaurants to choose from.  My family would go to church and then rotate between a few of our favorite restaurants for lunch.  One of my favorite restaurants is Houston's.  Then when my husband and I were dating, I found out his dad used to take him to Houston's all the time too.  So many Sundays were spent at this upscale restaurant.  My husband and I would go there on dates and on Sunday afternoons to keep the tradition going.  Houston's has many fabulous meal size salads and several homemade salad dressings.  I ate a few of their salads back in the day and would always get their buttermilk garlic dressing.  My husband's favorite thing on their menu was the Prime Rib sandwich that was served with shoestring french fries and he would order a side of Buttermilk Garlic dressing for dipping.  It was sooooo good!  Oh how I miss Houston's!  I tried to recreate their recipe and I think it's pretty darn close to perfect.  I added some cayenne pepper for some kick, or you can leave it out and enjoy the sweetness of the original.  I also use lite sour cream and mayonnaise...I'm sure Houston's doesn't use "LITE" anything in their restaurant.

My husband and I had salads for lunch yesterday topped with this fabulous homemade Buttermilk Garlic dressing.  I'm thinking about making some shoestring french fries for dipping just to make sure it really tastes perfect!

Ingredients:

3/4 cup lite sour cream
1 cup lite mayonnaise
3/4 cup buttermilk
1 large clove garlic, crushed (paste using knife blade and kosher salt)
1/2 tsp kosher salt
1/2 tsp black pepper
1 heaping tsp paprika
1 heaping tsp ground mustard
2 T white sugar
1/2 tsp (or more) cayenne pepper

Add all the ingredients to a bowl and whisk until smooth and creamy.  Add more buttermilk to thin if needed.  Cover and refrigerate for 2 hours so flavors will combine.  This is great served over a refreshing salad or used as a dip...for french fries, or veggies.  Enjoy!

Tip: Did you know you can make buttermilk using items you probably already have on hand? Just combine 1 cup milk with 1 T white vinegar. Let sit for 5 minutes, then use in your recipe. I used 2 tsp white vinegar for 3/4 cup milk for this recipe.


Hubby's lunch salad with sliced salami


Wednesday, October 20, 2010

Beef and Noodle Vegetable Soup


Fall is finally here...so it's finally time for warm comforting soups.  I love soups...it's an easy way for me to eat my veggies.  My husband and kids are not big soup lovers.  I'm trying to ease them into eating soup with me, so I started with a soup containing pasta and tender steak.  I'm still waiting for my Mom to visit and bring me a copy of our family's beef vegetable soup recipe, so until then, I will make up my own!   I can't wait for my Mom to bring over her recipe file so I can copy down all those wonderful dishes she cooked for us when we were growing up.  She always made a nice dinner no matter how many hours she worked...THANKS MOM...you're the best!

Now, back to this soup recipe.  My girls ate most of their soup...the beef was eaten first, then the noodles.  Well, at least they ate it.  A couple of veggies might have made it into their tummies.  My hubby said he could eat this soup every night.  He kept asking me "are you sure this is healthy"?

Ingredients:

1 lb beef chuck mock tender steak, cut into large bite size pieces
1 T olive oil
1 large white onion, cut into large pieces
1 cup sliced mushrooms
4 cloves garlic, chopped
3 stalks celery, sliced
1 cup baby carrots, cut in half
1 can diced tomatoes with juice
4 cups beef stock
1 can low sodium beef broth (2 cups)
2 dried bay leaves
1 tsp dried thyme
1/2 tsp onion powder
1/2 tsp garlic powder
kosher salt, to taste
black pepper, to taste
1/2 lb egg noodles

Preheat oven to 350 degrees.  In a large stock pot or dutch oven over medium high heat, add the olive oil.  Season the beef with salt and pepper, and add it to the hot oil to brown it on all sides.  Add the onion and mushrooms to the pot and cook for another 5 minutes.  Add the garlic, celery, and carrots.  Stir in the tomatoes, beef stock, beef broth, bay leaves, thyme, onion powder, and garlic powder.  Cover and bring to a boil.  Turn off the heat and transfer pot to the oven.  Simmer in the oven for 1 hour, or until the beef is very tender.  Put the soup back on the stove top on high heat.  Add the egg noodles and boil until noodles are tender.  Taste and add salt and pepper to taste.  Remove the bay leaves and serve.  I made mini corn muffins with our soup.  Enjoy!


Tuesday, October 19, 2010

Snack Idea: Pudding Bar


Are your kids famished when they get home from school? Do they always want to drive through Sonic to get a milkshake and tator tots? I've got a great snack idea that will fill them up and keep them happy until dinner time...a pudding bar! You can make whatever flavor(s) pudding you like and set out lots of different topping to either layer or sprinkle on top.

My girls like banana and vanilla pudding. So yesterday, I made banana pudding and layered it with bananas in individual serving cups. The toppings I had in the pantry were milk chocolate chips, butterscotch chips, white chocolate chips, marshmallows, and honey graham crackers. The topping choices are endless...all you need is some pudding as the base.

This is more of an idea than a recipe, but here's how easy instant pudding is to make:

1 large box instant pudding mix, any flavor
3 cups cold milk

Whisk together pudding and milk in a large bowl for 5 minutes until thick. Pudding is ready! How easy was that?!?

Topping Ideas:
chocolate chips: milk chocolate, semi-sweet, white, swirl
peanut butter chips
butterscotch chips
mint chips
marshmallows
granola
graham cracker crumbs
broken up candy bars
broken up cookies
fresh fruit
dried fruit
nuts
whipped cream

This is a quick snack that will please the whole family. We all really enjoyed our pudding snack!


Word to the wise: Don't leave the toppings in front of your kids unattended...they will eat all their goodies, then keep adding more to their cup when you're not looking. My 3 year old had a cup full of chocolate chips!

Now go have some fun with your kids!

I read a post about a pancake bar yesterday on riddlelove: http://www.riddlelove.com/2010/10/piece-together-perfect-pancake-pancake.html.
I thought that was a great idea!

Here are some other food bar ideas:
yogurt bar
ice cream/sundae bar
hot chocolate bar
nacho bar (our favorite)
taco bar
quesadilla bar
taquito bar
hamburger/hot dog bar
soup bar (chili, tortilla, tomato)
sandwich bar
pizza bar
baked potato bar
salad bar (obvious!)

Do you have any other food bar ideas? Please share...

Share your snack recipes...

Monday, October 18, 2010

Cheese Enchiladas


My husband asked me to make Cheese Enchiladas with the Chili sauce on top.  While practically inhaling it for dinner, he said this would be what he would want as his "final meal".  I was floored...my Italian husband choosing such a simple Mexican dish over a pasta or steak dinner.  He doesn't surprise me often...I know him very well after 24 years...but this shocked me!  I hope you enjoy it as much as he did.

I found a new recipe for the Enchilada Sauce over at Mommy's Kitchen.  Tina is a great Southern cook and I love all her comforting recipes.

Ingredients:

1-10 count large yellow corn tortillas
1 can mild enchilada sauce
1 can Wolf brand chili-no beans
2 T canola oil, divided
1 T flour, heaping
1 C low sodium chicken broth
1/2 tsp cumin
salt and pepper to taste
1-8oz. package finely shredded cheddar cheese
1-8 oz. package finely shredded cheddar/jack cheese
1/4 cup finely diced white onion

Toppings:
Sour cream
Black olives
Hot sauce
Green onions

Preheat oven to 350 degrees.  Spray a large casserole dish (at least 9X13) with non-stick cooking spray.

In a medium sauce pan over medium heat, add 1 T canola oil and 1 heaping T flour and stir.  Cook for 3 minutes to make a blonde roux.  Add the chicken broth, enchilada sauce, chili, cumin, salt, and pepper.  Stir to combine.  Reduce heat to low and let sauce heat up while you prepare the enchiladas.

Add the other 1 T canola oil to a small bowl.  Use a pastry brush to coat the top of a corn tortilla with oil and place on a heat proof plate.  Continue to brush oil on the tops of all tortillas and stack on top of each other.  Wet a paper towel and cover the tortillas.  Microwave for 1 minute.

It's time to assemble your cheese enchiladas.  Remove the enchilada sauce from the heat.  Add a layer of enchilada sauce to the bottom of your prepared casserole dish.  Put a layer of cheese down the middle of a corn tortilla, top with diced onions, and roll up tight.  Place in the casserole dish seam side down.  Continue filling tortillas and pack them in tightly next to each other side by side.  I was able to get 7 enchiladas side by side and then 2 enchiladas along the top, so 9 total.  Pour the remaining enchilada sauce over all the enchiladas.  Top with shredded colby jack cheese.  Cover with foil and bake for 20 minutes. 

Remove from the oven and serve immediately so the cheese stays all melty and gooey in the middle.  


Add your toppings of choice.  I prefer a dollop of sour cream.  Serve with a side of Mexican Rice and refried beans.  Enjoy!

Sunday, October 17, 2010

Peanut Butter Cookies with Butterscotch and Semi-Sweet Chocolate Chips


I wanted to bake some cookies this afternoon, but wanted something different.  I bought some butterscotch chips recently to use in some pumpkin cookies.  I haven't been able to find any canned pumpkin in the grocery stores yet, so I thought I could use them in something else.  I figured the salty peanut butter would go well with the sweet butterscotch chips and semi-sweet chocolate chips would help balance it all out.  They were fluffy and moist and definitely worth sharing with you. 

Ingredients:

1 1/4 C creamy peanut butter (I prefer Jif reduced fat)
1 C unsalted butter, softened
3/4 C white sugar
3/4 C packed light brown sugar
2 eggs
1 tsp vanilla extract
2 1/4 C all purpose flour
1 tsp baking powder
1 tsp baking soda
1/2 C butterscotch chips
1/2 C semi-sweet chocolate chips

Directions:

Preheat the oven to 350 degrees.

In a large mixing bowl, cream together the peanut butter, butter, white sugar, and brown
sugar for 2 minutes.  Add in the eggs and vanilla, and continue to beat for another 2 minutes.

In a small bowl, sift together the flour, baking powder, and baking soda.  Stir to combine.

Add the flour mixture to the peanut butter mixture.  Stir thoroughly until all flour is incorporated.

Add the butterscotch and chocolate chips.  Stir to combine.

Use a spoon to scoop out about 2 Tablespoons of dough.  Roll it into a ball in your hands.  Place cookie dough balls on non-stick baking sheet.  I pushed some extra chocolate chips into the tops of the cookies too.

Bake for 12-14 minutes, or until edges are lightly browned and tops have cracks.

Remove cookies from oven and let continue to cook on baking sheet another 5 minutes.  

Place cookies on a wire rack to cool completely.

Now enjoy a few...


Or many cookies!


Saturday, October 16, 2010

Homemade Soft Pretzels


I wanted to make my oldest daughter's teacher a "Thank You" gift for a great 1st six weeks of school.  She listed her favorite afternoon snack as being pretzels.  So I thought I would give homemade pretzels a try.  I've been working with homemade dough lately and love a culinary challenge.  I tried a freshly baked hot pretzel and they were really good.  I hope that Madison's teacher enjoyed them!  I only made a few changes to the original recipe.

Ingredients:

4 tsp active dry yeast
1 t white sugar
1 1/4 cup warm water (110 degrees)
4 cups flour (maybe more)
1/2 cup white sugar
1 1/2 tsp kosher salt
1 T vegetable oil

1/2 cup baking soda
4 cups hot water

Egg
1 T water
Kosher salt

Directions:

In a large bowl, add the yeast, 1 tsp sugar, and warm water.  Stir and let stand until creamy, about 10 minutes.

Add the flour, sugar, salt, and vegetable oil to the yeast mixture.  Stir with a spoon until it comes together.  You might need to add more flour until it's no longer sticky.

Turn out dough onto a floured work surface.  Kneed dough until smooth, about 8 minutes.

Wash your large bowl from earlier, dry, and coat with vegetable oil.

Form dough into ball, put into oiled bowl, and cover with towel.  Place bowl in oven and let rise until doubled in size, about 1 hour.


Preheat oven to 425 degrees.  Spray 2 non-stick baking sheets with Pam cooking spray.

In a deep skillet, dissolve baking soda and hot water.  Turn heat on low and let mixture come to a simmer.

Turn risen dough out onto a lightly floured work surface.  Shape into a square using your hands.  Use a pizza cutter to cut into 10 equal strips. 

Roll each piece into a rope and twist into a pretzel shape.  This video helped me figure out how to form the pretzel shape:  http://www.monkeysee.com/play/9620-twisting-pretzels

Place each pretzel shape onto prepared baking sheets.  When all pretzels are shaped, dip each pretzel into the baking soda solution for 10 seconds each.  


Use a slotted flat spatula to remove them and place back on the baking sheet.


11.  Beat up egg with 1 T water for egg wash.  Brush each pretzel with egg wash and sprinkle generously with kosher salt.

12.  Bake in preheated oven for about 8 minutes until browned.  


Enjoy!

Recipe Source: All Recipes

Sugar Cookie Bars


I made these sugar cookie bars as a "Thank You" gift for my daughter's teacher for a great 1st six weeks of school.  Everybody loves a good sugar cookie, right?  And these packed up really well in a colorful plastic box, then wrapped in purple saran wrap.  I hope she enjoyed them!  I got this recipe from Jamie Cooks It Up!.

Ingredients:

1 1/2 C sugar
1 C unsalted butter, softened
8 oz. cream cheese, softened
1 egg
1/2 t almond extract
1 t vanilla
1/2 t baking soda
1 t baking powder
2 1/2 C flour

Frosting:

1/2 C butter, softened
3 1/2 C powdered sugar
1 t almond extract
3-5 T milk
food coloring
sprinkles

Directions:

Preheat oven to 350 degrees.

In a large mixing bowl or stand mixer, beat the butter, cream cheese, sugar, and egg until nice and frothy, about 3 minutes.

Add the vanilla and almond extract, and mix.

In a small bowl, combine the flour, baking powder, and baking soda, and stir.

Add the flour mixture to the butter mixture and beat for about 2 minutes.

Press the dough into a large jelly roll pan (large cookie sheet pan with high sides).

Bake for 18-20 minutes.

Let the pan cool completely.  While they are cooling, you can make the frosting.

In a large mixing bowl or stand mixer, beat the butter until creamy, about 1 minute.

Add the powdered sugar, almond extract, and 3 T milk.  Mix for 2 minutes until smooth.  Add more milk as needed to get the right consistency.  You want it spreadable but also want it to set up good.

Frost your pan of cookies and decorate with sprinkles.  Cut cookies into bars.  Enjoy!

Friday, October 15, 2010

Cinnamon Apple Pancakes with Maple Bacon


What's for dinner tonight?  It HAS to be breakfast since I forgot to plan a meal and did not grocery shop today.  My girls like breakfast any time of day, so it was a special treat for them.  I cooked a lot this week and enjoyed making a simple meal.  My girls cleaned their plates.  Taylor even licked her clean...yuck!  My girls can't wait to spend the night at their Mimi and Dandad's house next weekend.  They always get treated to IHOP on Sunday morning.  Maybe next week I will make a quiche for dinner one evening...the possibilities are endless.

Ingredients:

8 pieces of thick slice bacon
Maple or regular pancake syrup

2 apples, diced small (I used Granny Smith)
dash of cinnamon
dash of nutmeg
1 T brown sugar
1/4 cup water

1 cup Hungry Jack Buttermilk Complete pancake mix
3/4 cup water
1/2 tsp cinnamon

Preheat oven to 400 degrees.  Lay bacon on foil lined baking sheet.  Lightly drizzle syrup over bacon (just a little bit).  Bake for 15 minutes, or until crispy.

In a small pan, add diced apples, dash of cinnamon, dash of nutmeg, 1 T brown sugar, and 1/4 cup water.  Simmer on low until apples are tender, about 10 minutes.

In a bowl, add pancake mix, water, and cinnamon.  Stir until combined.  Heat a large skillet or griddle on medium low heat.  Cook pancakes until golden brown.

Top pancakes with cinnamon apple mixture and syrup.  Enjoy with your maple bacon!

Related Posts with Thumbnails