This is another recipe from Guy Fieri Food ~ Cooking' It, Livin' It, Lovin' It Cookbook. This spice blend deserves its own post since it can be used on any protein. It can be stored in a tightly sealed container for up to 6 months. I used in on Guy's Cajun Chicken Fettuccine Alfredo (recipe tomorrow).
Ingredients:
3 T paprika
2 T kosher salt
1 T granulated or garlic powder
1 T black pepper
2 tsp ground white pepper
2 tsp onion powder
1 tsp cayenne
Whisk together all ingredients in a small bowl. Use on your favorite protein. Leftovers can be stored in a tightly sealed container for up to 6 months.
This is the perfect side dish for burgers and sandwiches. They are ready in 30 minutes and are fantastic dipped in my favorite Buttermilk Garlic Dressing/Dip. This is a basic method recipe, so play with different spice mixtures and have fun with creating your flavors.
Ingredients:
4 russet potatoes, washed and sliced into strips
olive oil
kosher salt
black pepper
garlic powder
Preheat oven to 425 degrees. Spray two baking sheets with non-stick cooking spray. Dry potato strips with paper towels, then place on baking sheets. Drizzle with olive oil and sprinkle with kosher salt, pepper, and garlic powder. Toss to coat evenly and spread out in a single layer. Bake until tender on the inside and slightly crispy on the outside, about 25-30 minutes. Enjoy!
I recently purchased Guy Fieri Food ~ Cooking' It, Livin' It, Lovin' It Cookbook. I have tons of recipes bookmarked to try, so I will share of few of them this week.
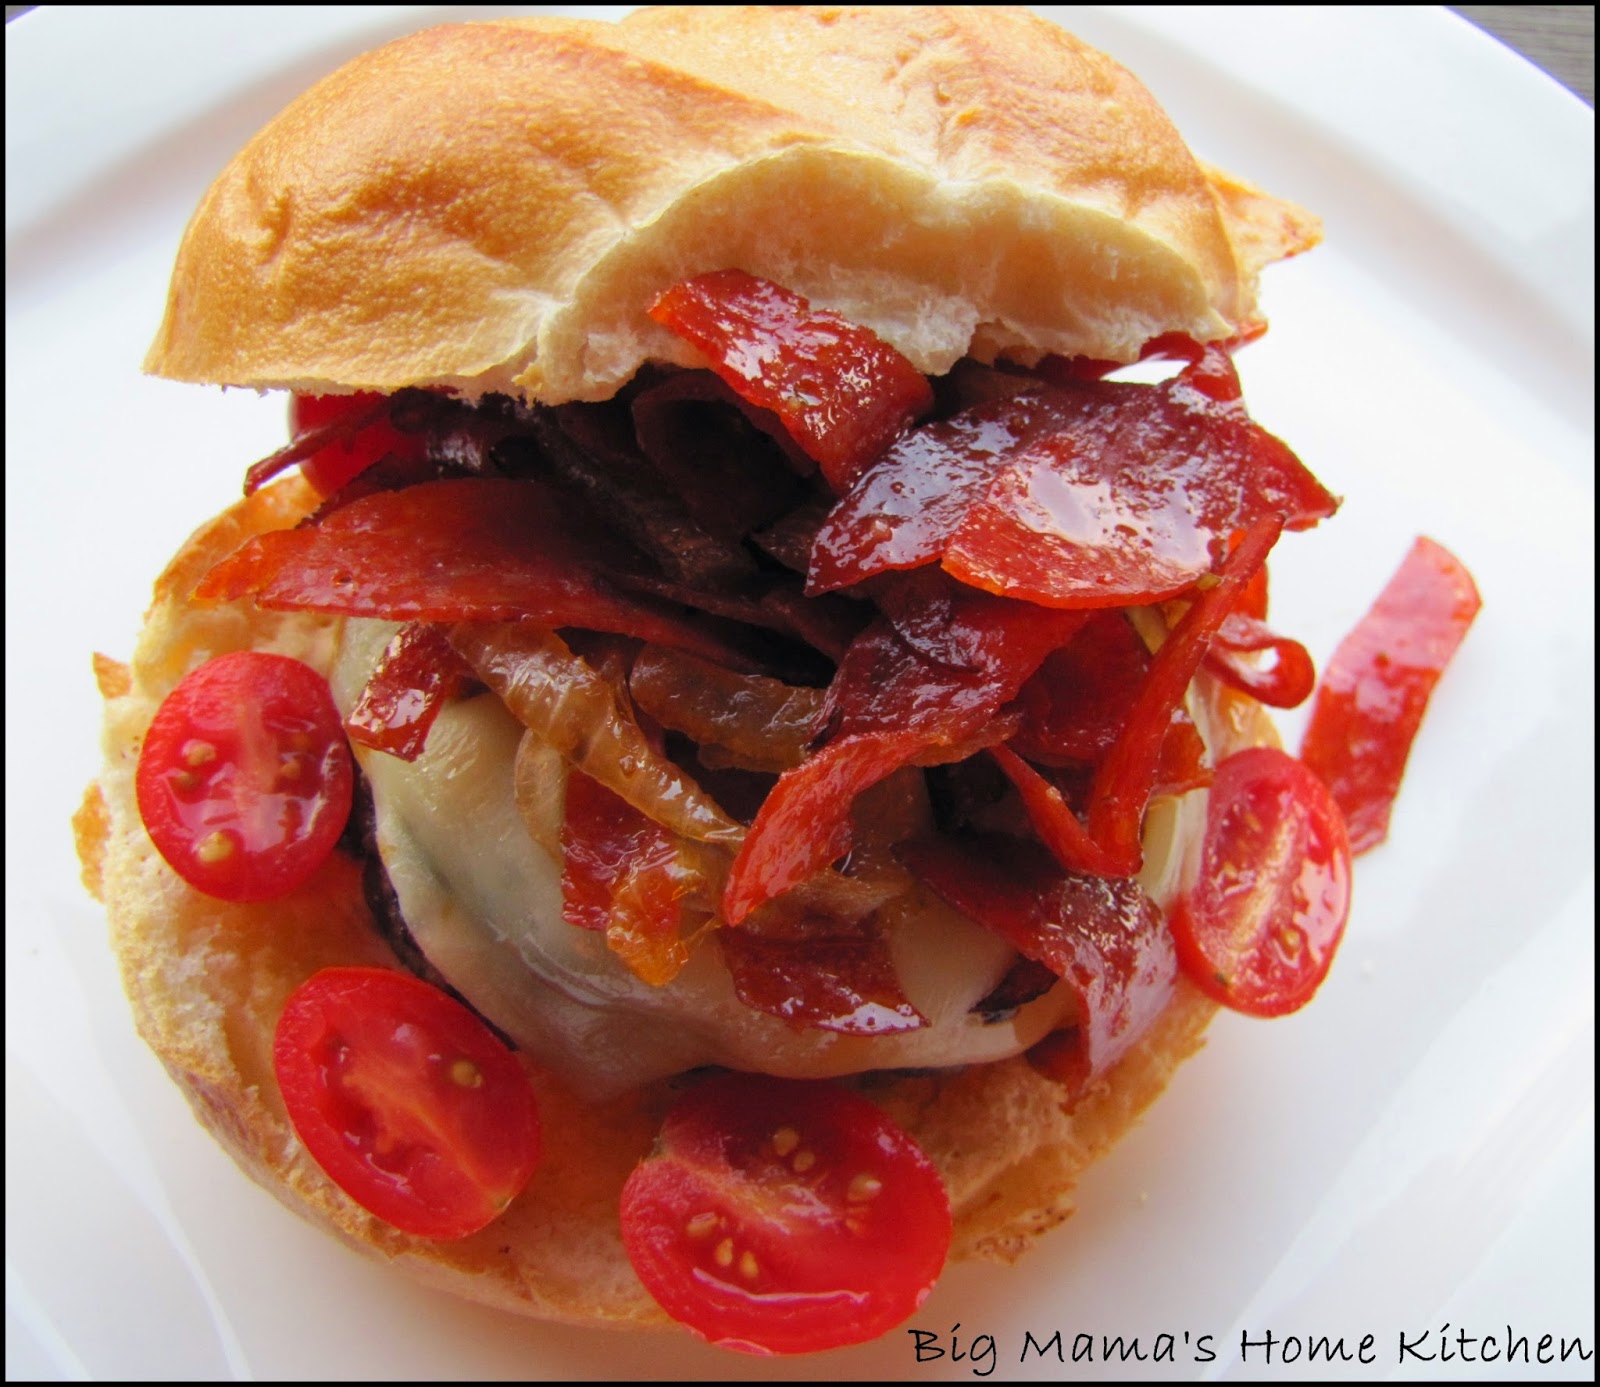
The first recipe is for these flavorful Pepperoni Burgers. Guy's son could not decide between a burger and pizza at their family's restaurant, Johnny Garlic's, so this is what Guy came up with. This is the first meal recipe in the cookbook that jumped off the page screaming "make for hubby ASAP!" Needless to say, it's his favorite cheeseburger to date. I adapted the recipe slightly to take these burgers over the top, as Guy would say.
Ingredients:
1 lb 80/20 ground beef
1 lb ground Italian sausage
1/2 tsp kosher salt
1/2 tsp black pepper
1 tsp Italian seasoning
2 T olive oil
1/4 lb pepperoni matchsticks
1/2 yellow onion, cut into one inch strips
2 cloves garlic, minced
1/4 cup cherry tomatoes, halved
pickled jalapenos (optional)
6 - burger buns, lightly toasted until warm
6 - slices cheddar/mozzarella cheese (Sargento)
6 - slices provolone cheese
Ketchup or marinara for buns
In a medium bowl, use your hands to combine the beef, sausage, salt, pepper, and Italian seasoning. Divide into 6 equal size portions and form into patties.
In a cast iron skillet over medium high heat, add the olive oil. When it's shimmering, add the pepperoni matchsticks. Cook until just crisp, about 5 minutes. Transfer to a paper towel lined plate.
In the same skillet, add the onion and cook for 5 minutes, then add the garlic and cook another minute. Transfer mixture to same plate as pepperoni.
In the same skillet, add the burger patties and cook for 5 minutes on the first side. Flip over and cook another 3-5 minutes. Top each burger with and a slice of both cheeses. Add a few ice cubes to the pan and cover with a lid for 3 minutes. This will allow the cheese to melt.
Note: You can obviously use an outdoor grill, indoor grill pan, or flat top to cook the burgers.
Toast the buns, spread some marinara or ketchup on each side, then place a burger on each. Top with onions, pepperoni, cherry tomatoes, and jalapenos. Enjoy!
Serve with Oven Baked Fries and Buttermilk Garlic Dressing.
I had this brilliant idea to mix up our weekly taco night by making taco salads. Then my grocery store didn't have any of the taco bowls. I was bummed and still wanted to make them, so I decided to use my jumbo muffin pan to make mini taco bowls using corn tortillas. They were fine for my kids, but just not big enough to hold all of the good stuff I like on my taco salad. So I ended up making my taco salad on a big plate and topped it with oven baked crispy corn tortilla strips. I drizzled lots of my favorite Buttermilk Garlic Dressing and enjoyed every single bite.
The mini taco salad "bites" would be great appetizers or kid friendly portions. They are cute and portable. Football season is about to begin and appetizers are always on my mind.
Taco Beef Ingredients:
1 lb lean ground beef (93/7)
1/4 cup yellow onion, chopped
2 cloves garlic, minced
1 packet taco seasoning
1 cup water
In a large skillet over medium high heat, brown ground beef. Add onions and garlic and cook until translucent. Stir in the taco seasoning and water. Cover and bring to a boil. Lower heat and simmer for 8 minutes.
Toppings:
shredded lettuce
shredded cheese
tomatoes
avocados
black olives
jalapenos
To make corn tortilla strips, preheat oven to 400 degrees. Cut corn tortillas into strips. Place in a single layer on baking sheet, spray with cooking spray, and sprinkle with kosher salt. Bake until crispy, about 8 minutes.
To make taco bowls, preheat oven to 400 degrees. Wrap corn tortillas in moist paper towels and microwave for 30 seconds. Fit tortillas in jumbo muffin tins, spray with cooking spray, and sprinkle with kosher salt. Bake until crispy.
Assemble your taco salads the way your prefer, and enjoy!
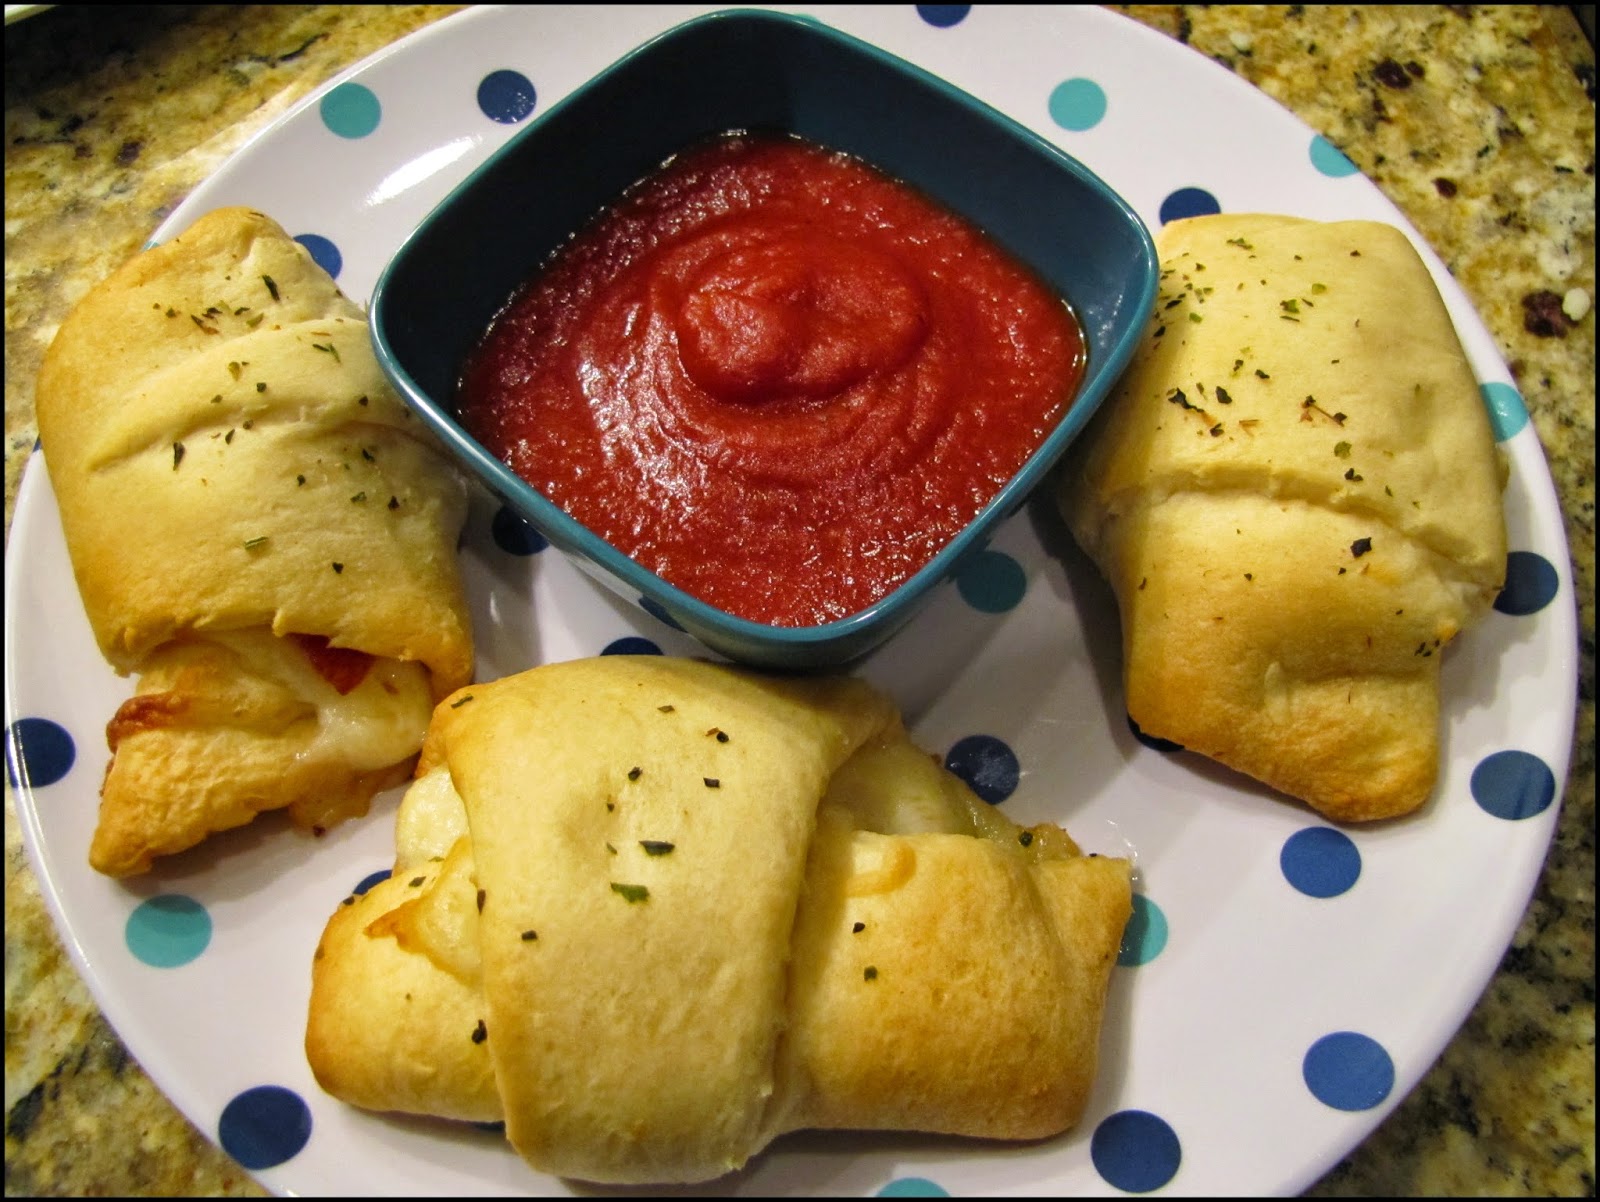
If you have a tube of crescent rolls and pizza toppings in the fridge, you can create these little pepperoni pizza crescents in a flash. Theyare perfect for a simple lunch or dinner for your kids, an after school snack, or as an appetizer for a football party (Go Cowboys!). Your kids can do all the hard work and feel proud they made their own meal. Of course, make sure an adult is the hot oven operator.
Ingredients:
1 tube Crescent rolls (8 count)
pepperoni slices, cut into strips
shredded mozzarella
Italian seasoning
garlic powder
marinara or ranch for dipping
Preheat oven to 350 degrees. Spray a baking sheet with non-stick cooking spray.
Unroll all the Crescents and separate the triangles. Lay some pepperoni strips and sprinkle shredded mozzarella cheese on each triangle. Beginning at the base of the triangle, roll up to the small tip. Place on baking sheet and sprinkle with Italian seasoning and garlic powder.
Bake for 12-15 minutes, or until golden brown. Serve with a side of marinara or ranch for dipping. Enjoy!
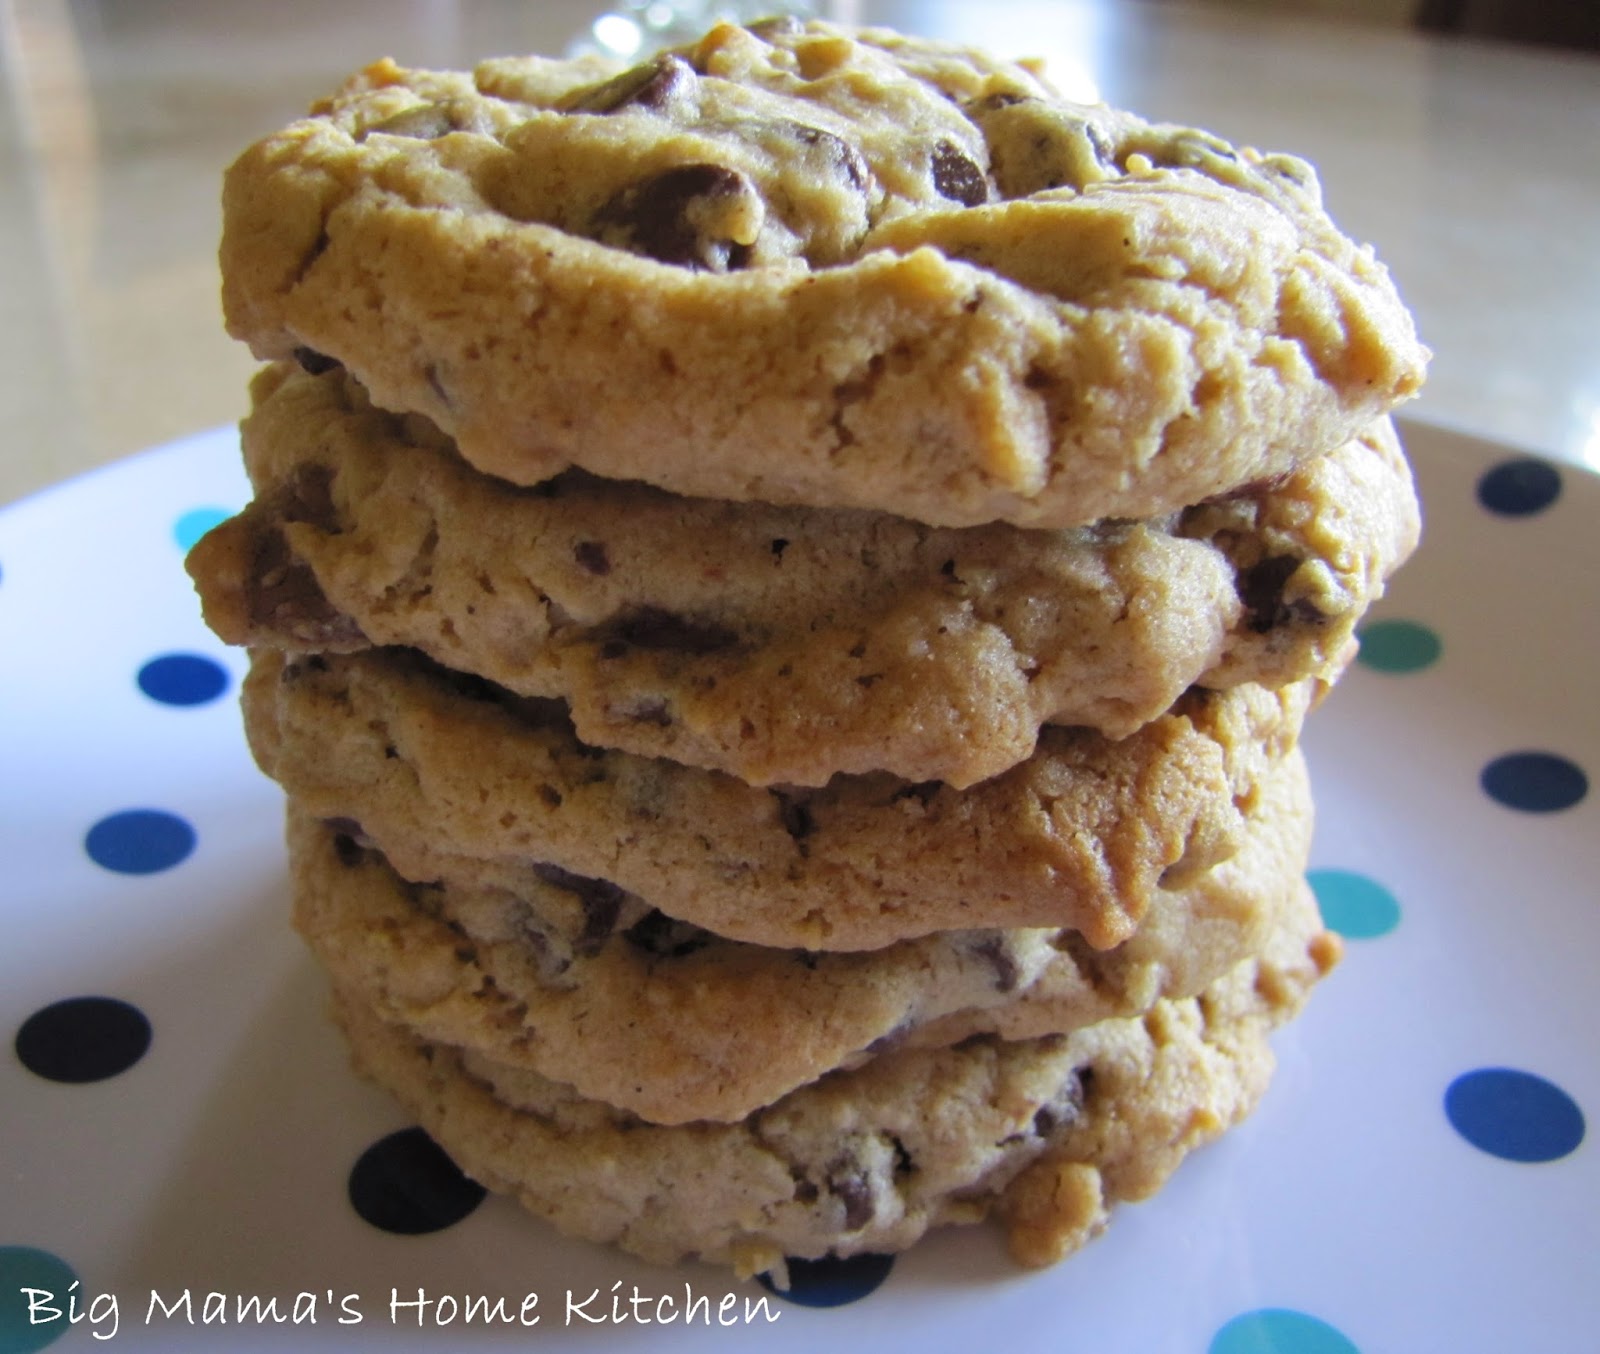
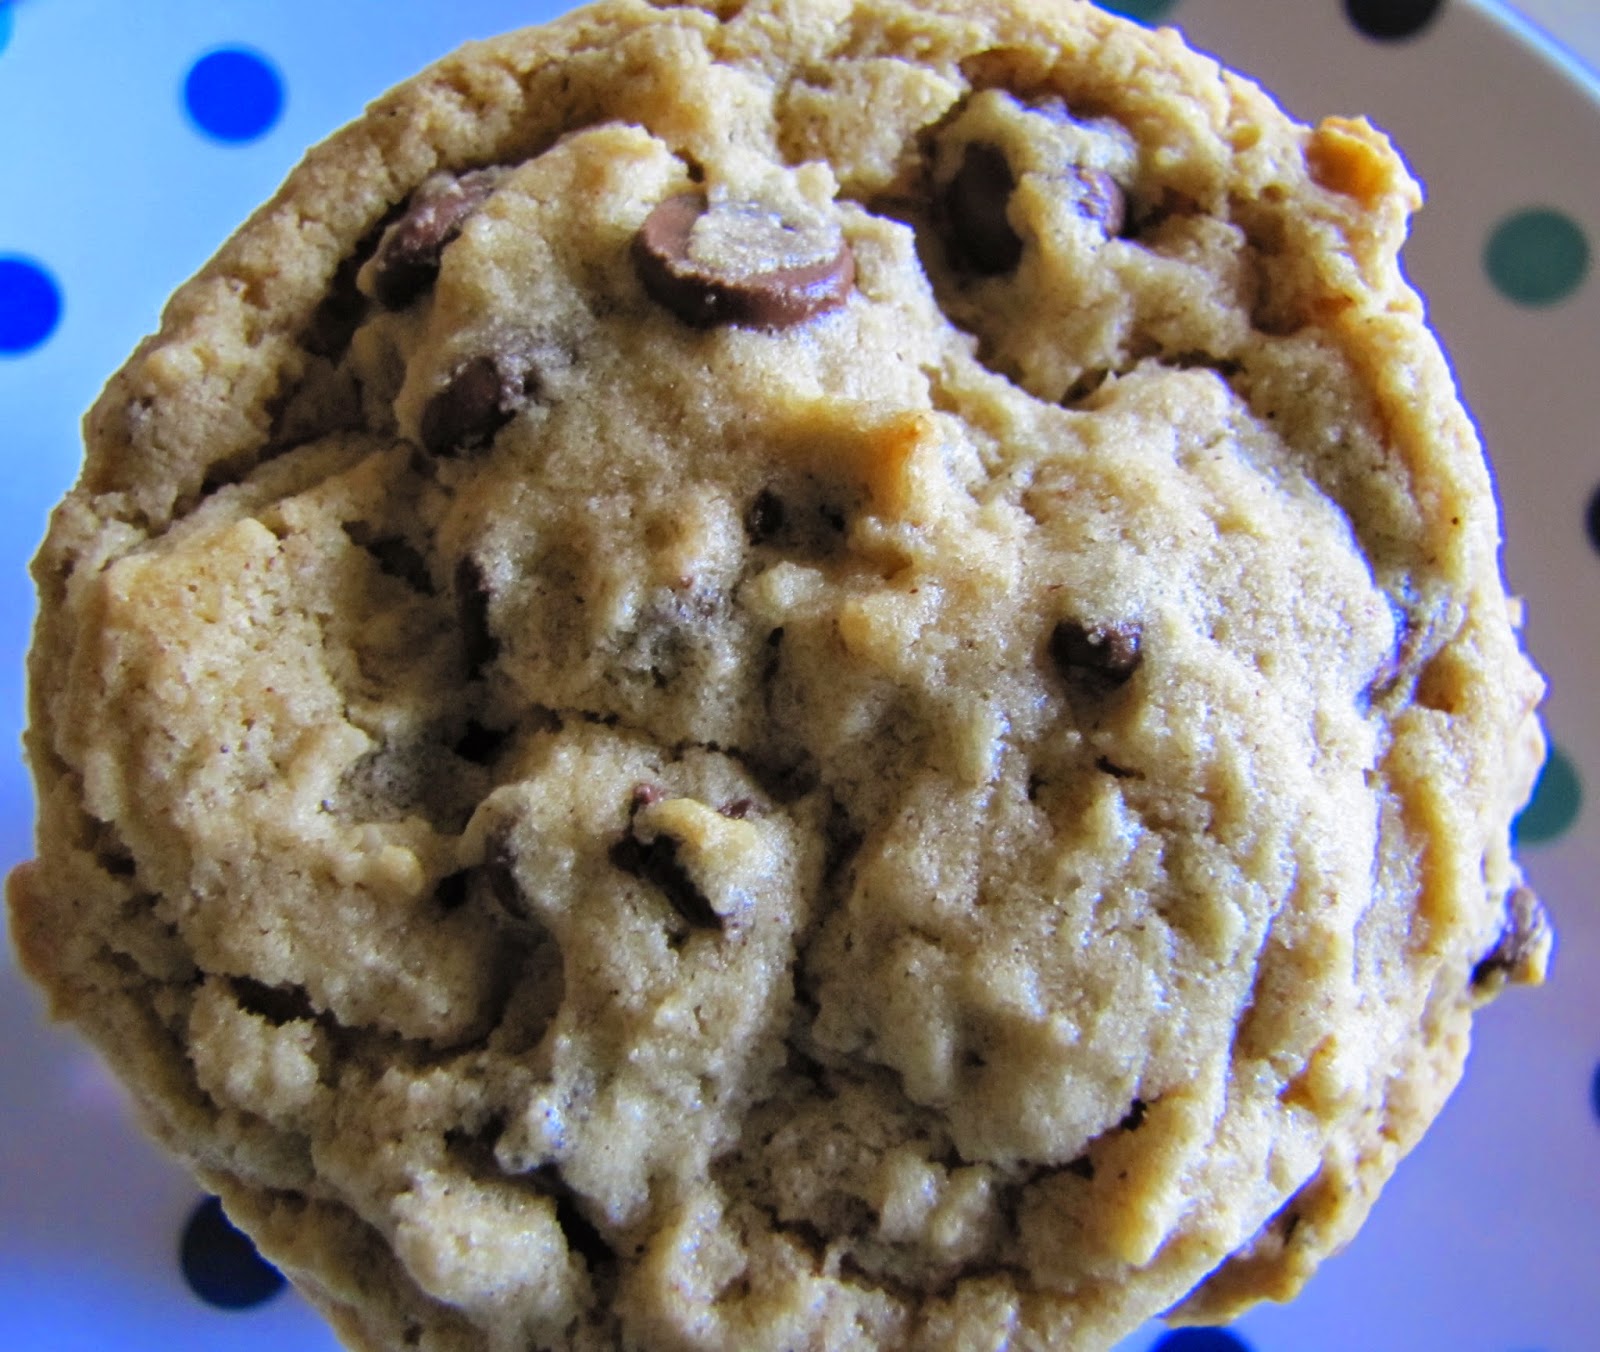
I LOVE LOVE LOVE cookies!!! They are my favorite sweet treat. I'm always looking for great flavor combinations, and I came across this recipe on Brown Eyed Baker. It has all my favorite flavors all in one cookie. They were ridiculously good and my waist line is still upset with me for grabbing one every time I passed through the kitchen.
Ingredients:
1 cup all purpose flour
1 tsp baking soda
pinch of salt
1 stick (1/2 cup) unsalted butter, room temperature
1/2 cup creamy peanut butter
1/2 cup sugar
1/3 cup light brown sugar
1 tsp pure vanilla extract
1 egg
1/2 cup old fashioned oats
1 cup semisweet chocolate chips ( I used 1/2 cup mini, 1/2 cup regular)
Preheat oven to 350 degrees. Line two baking sheets with parchment paper.
In a medium bowl, whisk together the flour, baking soda, and salt.
In a large stand mixer bowl, cream together the butter, peanut butter, sugar, and brown sugar until light and fluffy, about 3 minutes. Add the vanilla extract and egg and beat to combine. Add the flour and mix just until combined. Add the oats and chocolate chips and mix until distributed evenly.
Use a 2 oz. cookie scoop and drop dough about 2 inches apart. Makes about 22 cookies. Bake for 10 minutes, or until edges are slightly golden brown. Let cool completely on baking sheets. Store leftovers in an airtight container at room temperature. Enjoy!
These muffins are the huge, sweet, dense muffins you get at a bakery that serves gourmet coffee. They are addictive, so proceed with caution! I made 6 Jumbo muffins (because I only have one pan) and 4 regular cupcake size muffins.
Recipe makes 8 Jumbo muffins or 16 regular size muffins
Muffin Ingredients:
3 cups all purpose flour
1 1/2 cups sugar
1/4 tsp salt
4 tsp baking powder
2/3 cup canola or vegetable oil
2 eggs
2/3 cup milk
1 1/2 cups fresh blueberries (reserve 1/2 cup to push into tops)
Preheat oven to 350 degrees. Spray your muffin tins liberally with non-stick cooking spray or use liners. Stir together the flour, sugar, salt, baking powder, canola oil, eggs, and milk. Batter will be really thick. Carefully fold in 1 cup of the fresh blueberries. Fill the muffin tins 3/4 of the way full. Press the remaining 1/2 cup fresh blueberries into the top of each muffin.
Streusel Topping:
6 T sugar
1 T + 1 tsp canola oil
1 T + 2 tsp flour
In a small bowl, stir together ingredients until mixture resembles coarse crumbs. Sprinkle over top of muffins.
Bake jumbo muffins for 32-35 minutes, and regular muffins for 22-25 minutes, or until toothpick inserted into the middle comes out clean. If not using liners, let cool in pan before trying to remove. If using liners, let cool in pan for 2 minutes, then transfer to cooling rack. Serve warm and store leftovers in an airtight container. Enjoy!
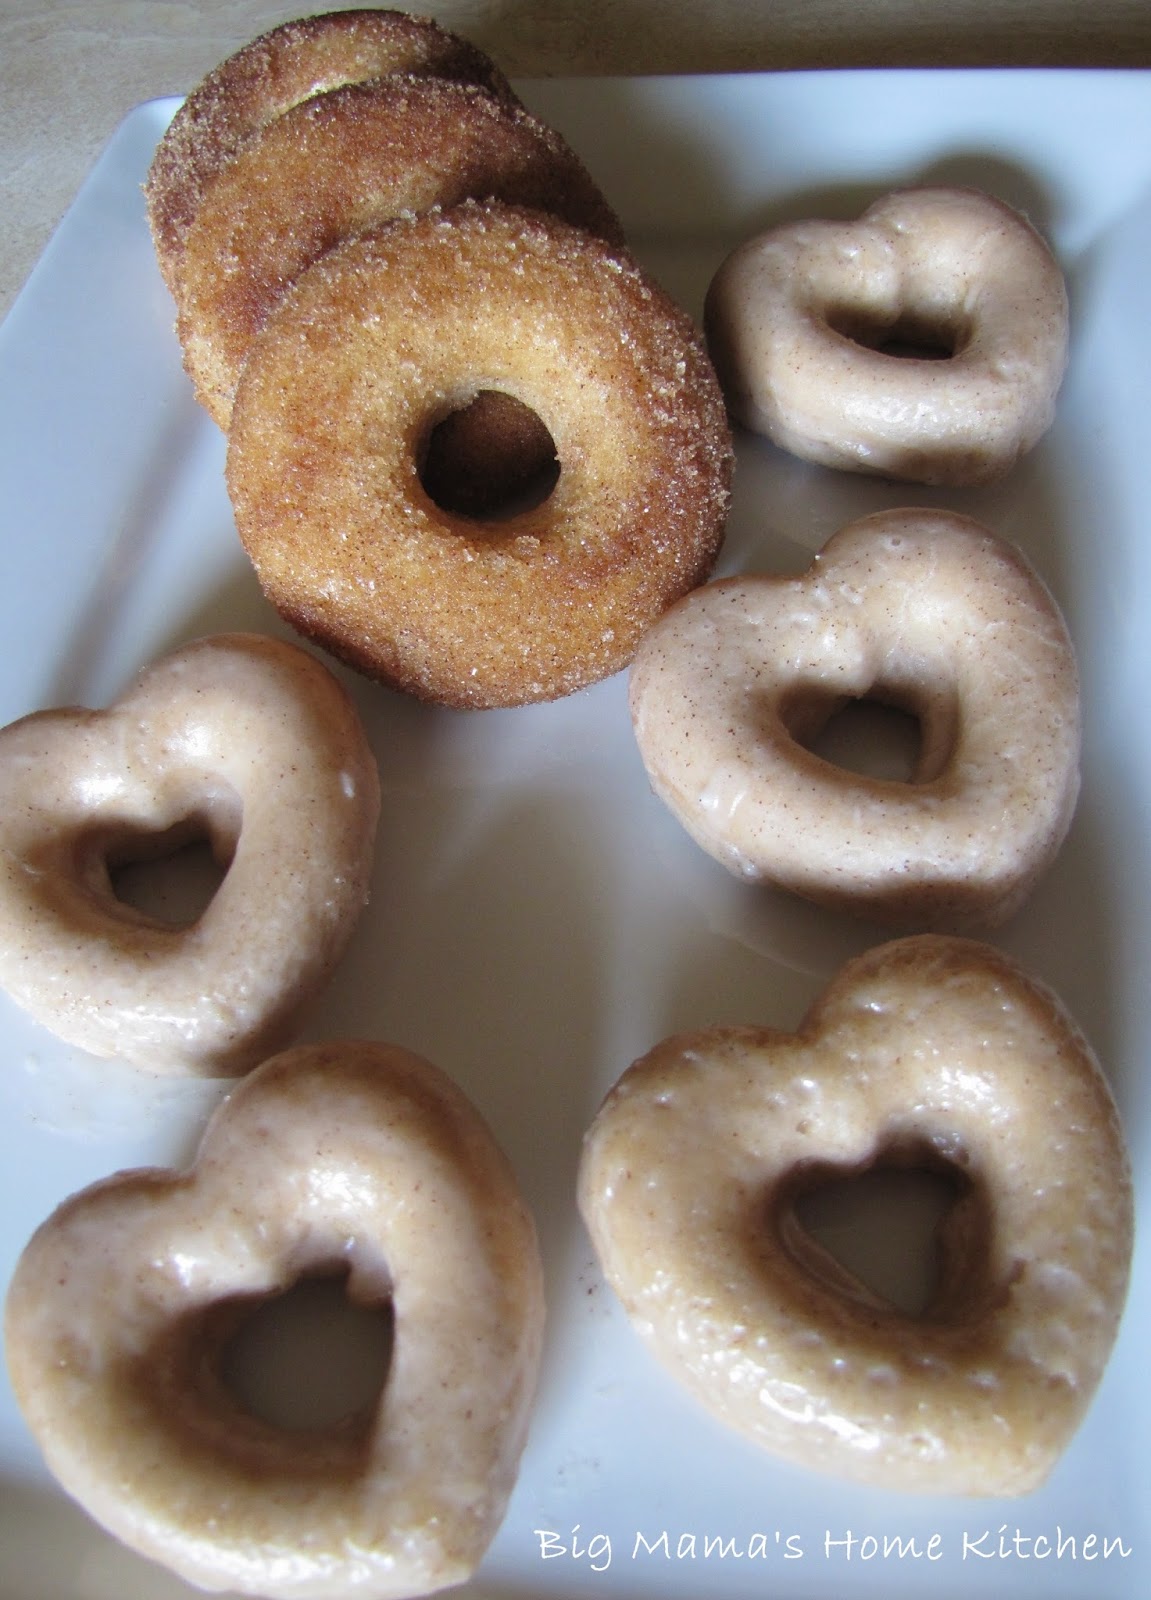
I made these cute little mini heart shaped donuts for my girls. This is their last week of summer, so I have been making lots of kid friendly food. The heart shaped donuts are double glazed in a cinnamon powdered sugar glaze. The regular size donuts are rolled in melted butter, then in a cinnamon/sugar mixture.
This cake donut batter can be used in mini donut pans, regular donut pans, or mini muffin pans. This recipe makes 12 mini donuts or 6 regular donuts.
Donut Ingredients:
1 cup cake flour, sifted
1/4 cup plus 2 T sugar
1 tsp baking powder
1 tsp cinnamon
1/2 tsp salt
1/4 cup plus 2 T buttermilk
1 egg
1 T melted butter
Preheat oven to 400 degrees. Spray donut pan(s) with non-stick cooking spray.
In a large mixing bowl, sift together the cake flour, sugar, baking powder, cinnamon, and salt. Add buttermilk, egg, and butter. Beat until just combined. Fill each donut cup 1/2 full, approximately 2 T batter for mini donuts, or 3 T for regular donuts.
Bake mini donuts for 5-6 minutes, and regular donuts for 7-8 minutes, or until the tops spring back when touched. Invert donut pan over cooling rack on top of baking sheet. Let donuts cool slightly before glazing or coating in cinnamon/sugar.
Cinnamon Glaze:
1 cup powdered sugar
3 T milk
1/2 tsp cinnamon
In a small bowl, stir together all ingredients. Dip each donut in glaze on both sides. Return to cooling rack. Let dry and repeat process for double glaze.
Cinnamon/Sugar Coating:
4 T melted butter, in small bowl
4 T sugar and 1/2 tsp cinnamon, mixed together in small bowl
Dip each donut in the melted butter on both sides, then roll around in cinnamon/sugar coating. Return to cooling rack to set up. This will coat 1/2 batch of donuts, so double if using on all donuts.
Enjoy!
My family loves when I make baked Italian dishes like lasagna, ziti, and manicotti, so I came up with this recipe to please all of our taste preferences. Jumbo shells are stuffed full with a mixture of sausage, spinach, mozzarella, parmesan, and ricotta cheese. They are baked nestled on a bed of homemade marinara, topped with more marinara and mozzarella cheese, then baked until the filling is warm and gooey. This recipe makes two large casserole dishes, so you can share with your neighbors, enjoy leftovers, or freeze some.
I used five of these individual serving baking dishes...
And made a large casserole dish for my hubby to share at work...
Ingredients:
1 batch Homemade Marinara
1 - 12 oz. box Jumbo Shells, cooked al dente
1 1/2 cups shredded mozzarella cheese (for topping)
Filling:
1 lb ground Italian sausage
2 cloves garlic, minced
10 oz box or 12 oz package frozen chopped spinach, drained and squeezed of excess water
1 cup shredded mozzarella cheese
1/4 cup shredded parmesan cheese
3/4 cup ricotta cheese
3 T grated parmesan cheese
1 egg, beaten
1 tsp Italian seasoning
kosher salt, to taste
black pepper, to taste
garlic powder, to taste
Preheat oven to 350 degrees. Spray two large casserole dishes with non-stick cooking spray.
In a large skillet over medium high heat, brown sausage until cooked through. Add the garlic and cook another minute. Remove from stove and allow to cool.
In a large bowl, stir together spinach, 1 cup of the shredded mozzarella, shredded parmesan, ricotta, grated parmesan, egg, Italian seasoning, and kosher salt, black pepper, and garlic powder to taste. Add the sausage mixture when cooled and stir well to combine.
Ladle a deep bed of marinara in each casserole dish. Stuff each Jumbo shell with filling and place side by side within the casserole dishes. Ladle marinara over top of shells and top with remaining 1 1/2 cups shredded mozzarella.
Cover with foil and bake for 25-30 minutes, or until filling is melted and marinara is bubbly. Let cool slightly before serving. Enjoy!
My hubby recently got back in contact with a friend from our high school days. Todd told him how much I love to cook and bake and that I started writing my own cooking blog. His friend said that his wife, Amy, also loves to cook and co-wrote a cookbook with a friend of hers, Grace. I ordered it right away and stayed up late reading it cover to cover the day it arrived in the mail.
It is called Keeping Up Cookbook, Written by: Grace Ivory Rock and Amy Henriksen Foulger
Amy and Grace also have a Blog, and a Facebook page. Show them some love!
This cookbook has over 250 recipes, a "collection of tried and true favorites" they have "tested and tweaked during the last decade". There are appetizers, breakfasts, baked goods, soups, salads, side dishes, dinners, sweets, and cookies (my favorite).
There are many recipes I have bookmarked to try and will be sharing a few of them with you. The first recipe is this amazing Cinnamon Apple Crumb Pie! It was seriously so good! The Fall season can't get here soon enough for me, but I think that apple pie is perfect year round. Baked apples and cinnamon are a favorite combination in our home, and I have an entire category devoted to it on my blog.
Can you believe I made a homemade pie crust too, and it was great? I used Matha Stewart's pie crust recipe, which makes two crusts, so I have an extra one waiting in the freezer.
Ingredients:
1 (9-inch) deep dish pie crust, chilled
Apple Filling:
2 1/2 lbs Granny Smith apples (5 large), peeled, cored, sliced 1/4 inch thick
2/3 cup sugar (I used 1/3 cup)
2-3 T flour
2 tsp cinnamon
2 T butter, melted
Preheat oven to 375 degrees. Place the pie crust in a 9-inch deep dish pie plate and refrigerate until ready to use. Line a baking sheet with foil.
In a large bowl, stir together apples, sugar, flour, cinnamon, and melted butter. Set aside.
Crumb Topping:
1 cup flour
1/2 cup brown sugar
1/4 cup sugar
1 1/2 tsp cinnamon
1/2 tsp salt
6 T cold butter, cut into small pieces
You can either use a pastry cutter, fork, or your food processor to blend the crumb topping ingredients together. Mix together the flour, brown sugar, sugar, cinnamon, and salt, then cut in the chilled butter (or pulse in food processor) until mixture resembles coarse crumbs.
Transfer apple filling to chilled pie crust and sprinkle with crumb topping. Place on foil lined baking sheet. Bake for 45 minutes, then cover loosely with foil and bake for another 30 minutes. Apples should be fork tender. Cool for 1 hour to allow it to set up. Serve warm with vanilla ice cream or whipped cream. Enjoy!
Note: Leftovers can be reheated in the oven to keep the topping and pie crust crispy. It's also really good cold from the refrigerator.
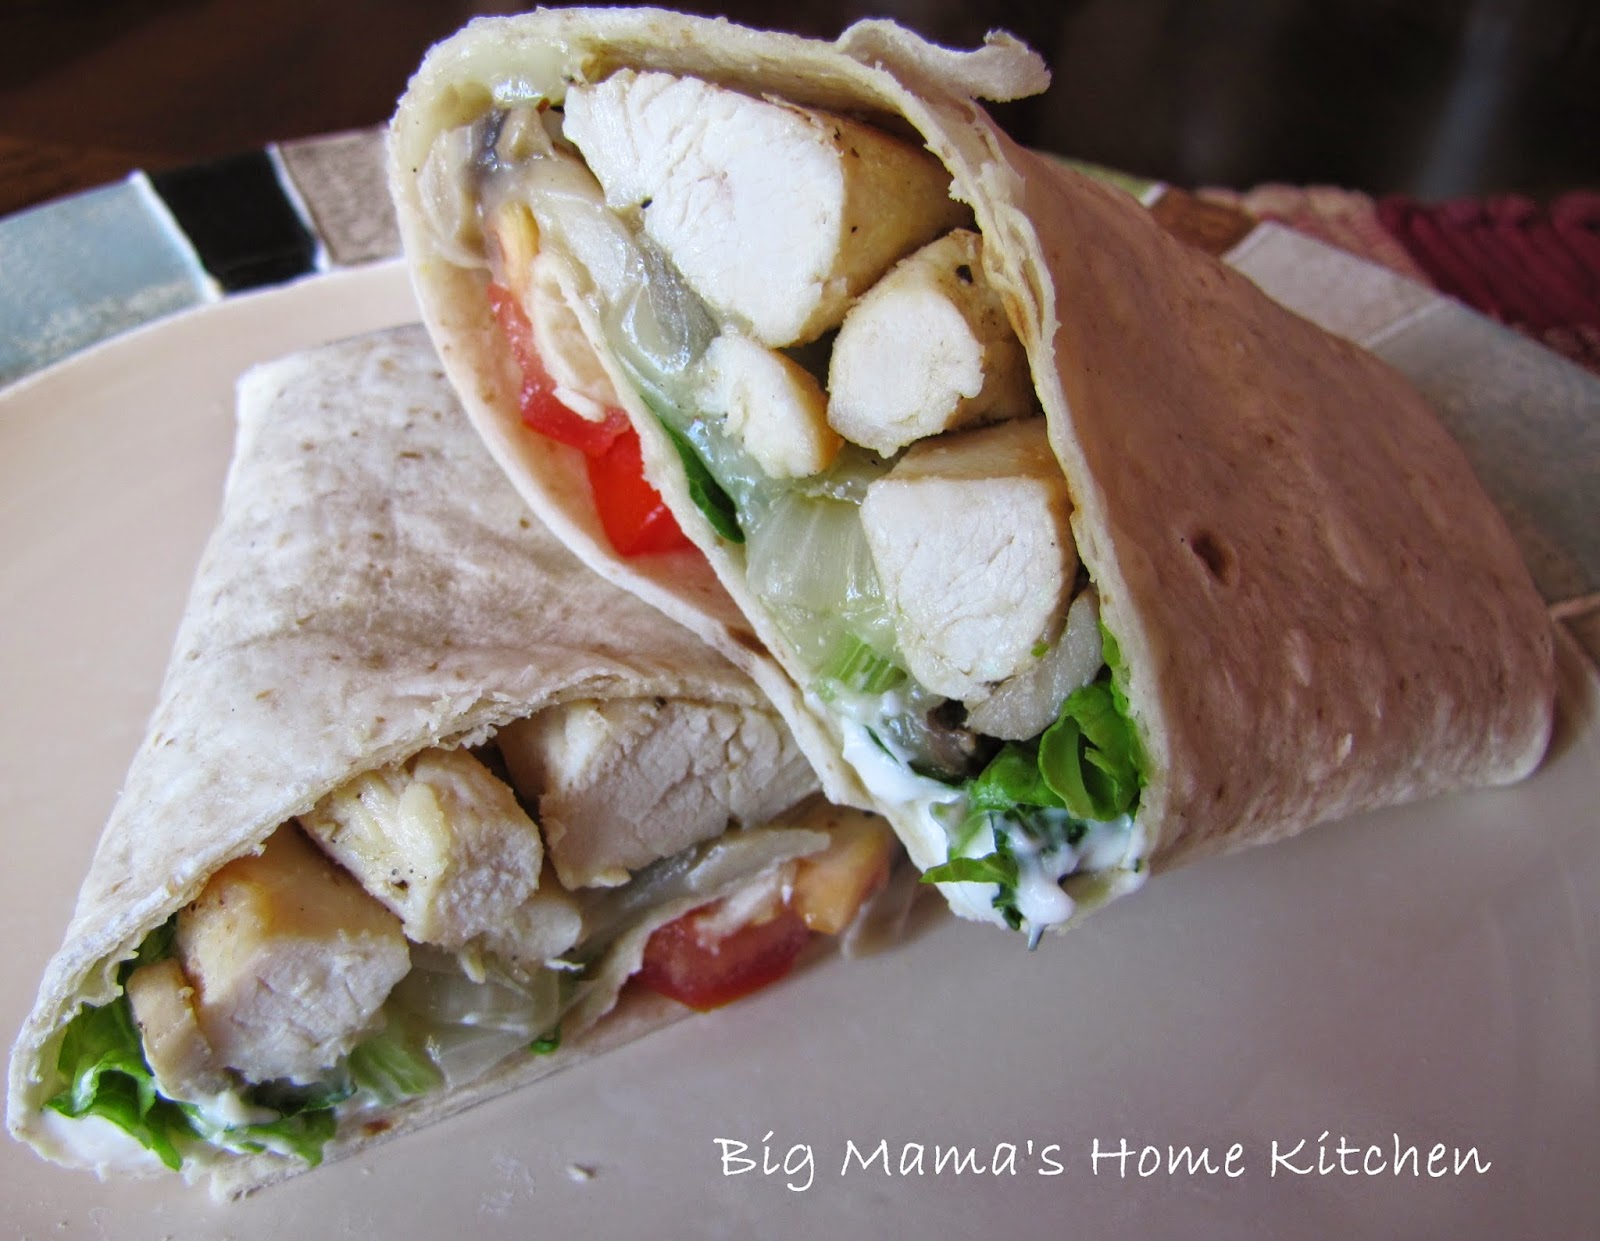
Here is a twist on the traditional Philly Chicken Sandwiches by using a wrap in place of the hoagie bun. It was much lighter and a nice change, although I do love my bread.
Ingredients:
1 lb boneless skinless chicken breasts, cut into strips
kosher salt
black pepper
garlic powder
1 T olive oil
1 T butter
1 cup button mushrooms, cut in half
1/2 yellow onion, sliced
Provolone cheese slices
Tortilla wraps
mayonnaise
shredded lettuce
diced tomatoes
In a large skillet over medium low heat, add the butter, mushrooms, and onions. Cook until mushrooms are tender and onions just begin to brown around the edges. Transfer to a bowl.
Season the sliced chicken with kosher salt, black pepper, and garlic powder. In the same skillet over medium high heat, add the olive oil and seasoned chicken. Stir chicken and continue to cook until completely cooked through. Add the mushroom and onions to the chicken and stir well. Add slices of provolone cheese to top of chicken/mushroom/onion mixture, cover with a lid, and turn off the heat.
Dampen a few paper towels and wrap around the tortilla wraps. Heat in the microwave until warm, about 45 seconds. Assemble the wraps. Spread the wrap with a layer of mayonnaise, chicken/mushroom/onion/cheese, shredded lettuce, and diced tomatoes. Fold up ends, then wrap and roll. Enjoy!
This is a sweet and tangy key lime pie with a graham cracker crust and topped with Cool Whip. It's so simple to make, especially if you are using a store bought pie crust. I prefer to make the pie crust because I like it to be thicker and flavored with a touch of cinnamon. You do have to bake the pie crust before filling, but only for 12 minutes. You just blend three ingredients together for the filling, top with Cool Whip, and refrigerate until cold. It's that easy. If you like Key Lime Pie and Coconut Pie, check out this Key Lime Coconut Pie.
Pie Crust Ingredients:
1 1/2 cups finely crushed honey graham crackers
7 T unsalted butter, melted
2 T sugar
1/2 tsp cinnamon
Preheat oven to 350 degrees. In a small bowl, stir together all ingredients. Spray a pie dish with non-stick cooking spray. Firmly press the mixture into the pie dish, using a measuring cup to press it up the sides. Bake for 10 minutes. Cool completely before filling.
Pie Filling Ingredients:
2 - 14 oz. cans sweetened condensed milk
1/2 cup fresh lime juice (5 small limes or 20 key limes)
zest from 1 small lime or 3 key limes (optional)
1 tsp pure vanilla extract
1 - container Cool Whip (you can stir in 1/2 tsp vanilla if you like)
In a large mixing bowl, beat together the sweetened condensed milk for 3 minutes. Add the lime juice, zest, and vanilla and beat until well combined. Pour into the graham cracker crust. Top with Cool Whip and spread to the edges. Refrigerate until cold, about 4 hours. Keep leftovers covered in refrigerator. Enjoy!
Our neighbors brought over some rich chocolate and marshmallow treats last week. When I asked her for the recipe, she sent over a Whoopie Pie pan and all the ingredients to make them. She's so sweet! I have never eaten a Whoopie Pie before. In this recipe, the cookies are made with cake mix, then are used to sandwich sweet marshmallow buttercream frosting. If you don't have a Whoopie Pie pan, you can use a mini cupcake pan, cut them in half, and fill them.
I made some regular Whoopie Pies...
Open faced Whoopie Pies...
And Mini Cupcake Whoopie Pies...
Cookie Ingredients:
1 - 18.25 oz. box Chocolate Fudge cake mix
3 eggs
1 cup water
1/2 cup canola oil
Preheat oven to 325 degrees. In a large stand mixer bowl, beat together all cookie ingredients for 3 minutes, or until batter is fluffy. Fill the Whoopie Pie pan 2/3 of the way full. Bake for 8 minutes, or until it springs back to the touch. Let cool in pan for 3 minutes, then flip them out onto wire rack to cool completely.
Note: If making mini cupcakes, bake for 10 minutes.
Marshmallow Buttercream Filling:
6 T unsalted butter, softened
1 1/2 cups powdered sugar, sifted
dash salt
1 - 7 oz. jar Marshmallow Creme
1 tsp pure vanilla extract
food coloring (optional)
In a large stand mixer bowl, beat together the butter and powdered sugar until light and fluffy. Add the salt, Marshmallow creme, vanilla extract, and food coloring (if using). Beat for another minute until combined.
To assemble regular Whoopie Pies, spread or pipe some of the filling on a cookie and place another cookie on top. If using cupcakes, cut them in half and spread some filling in the middle. If making open faced, cut up a cookie as garnish. Enjoy!
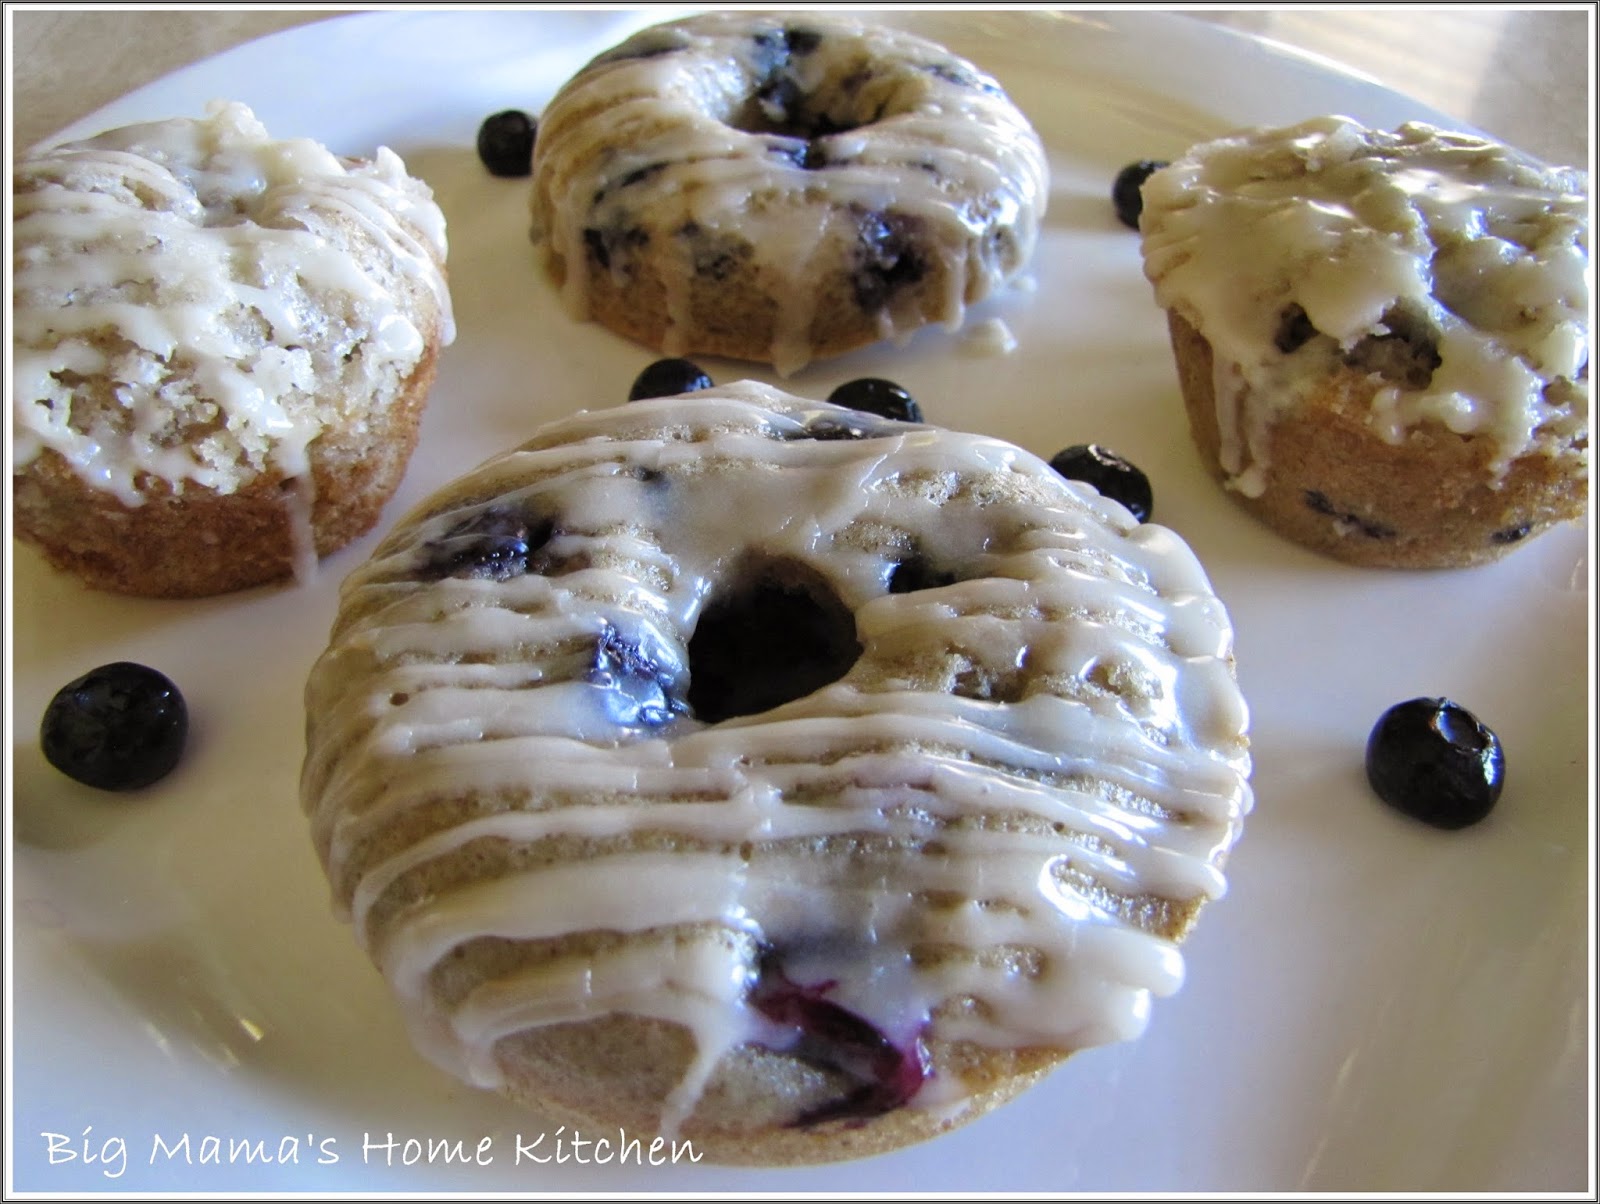
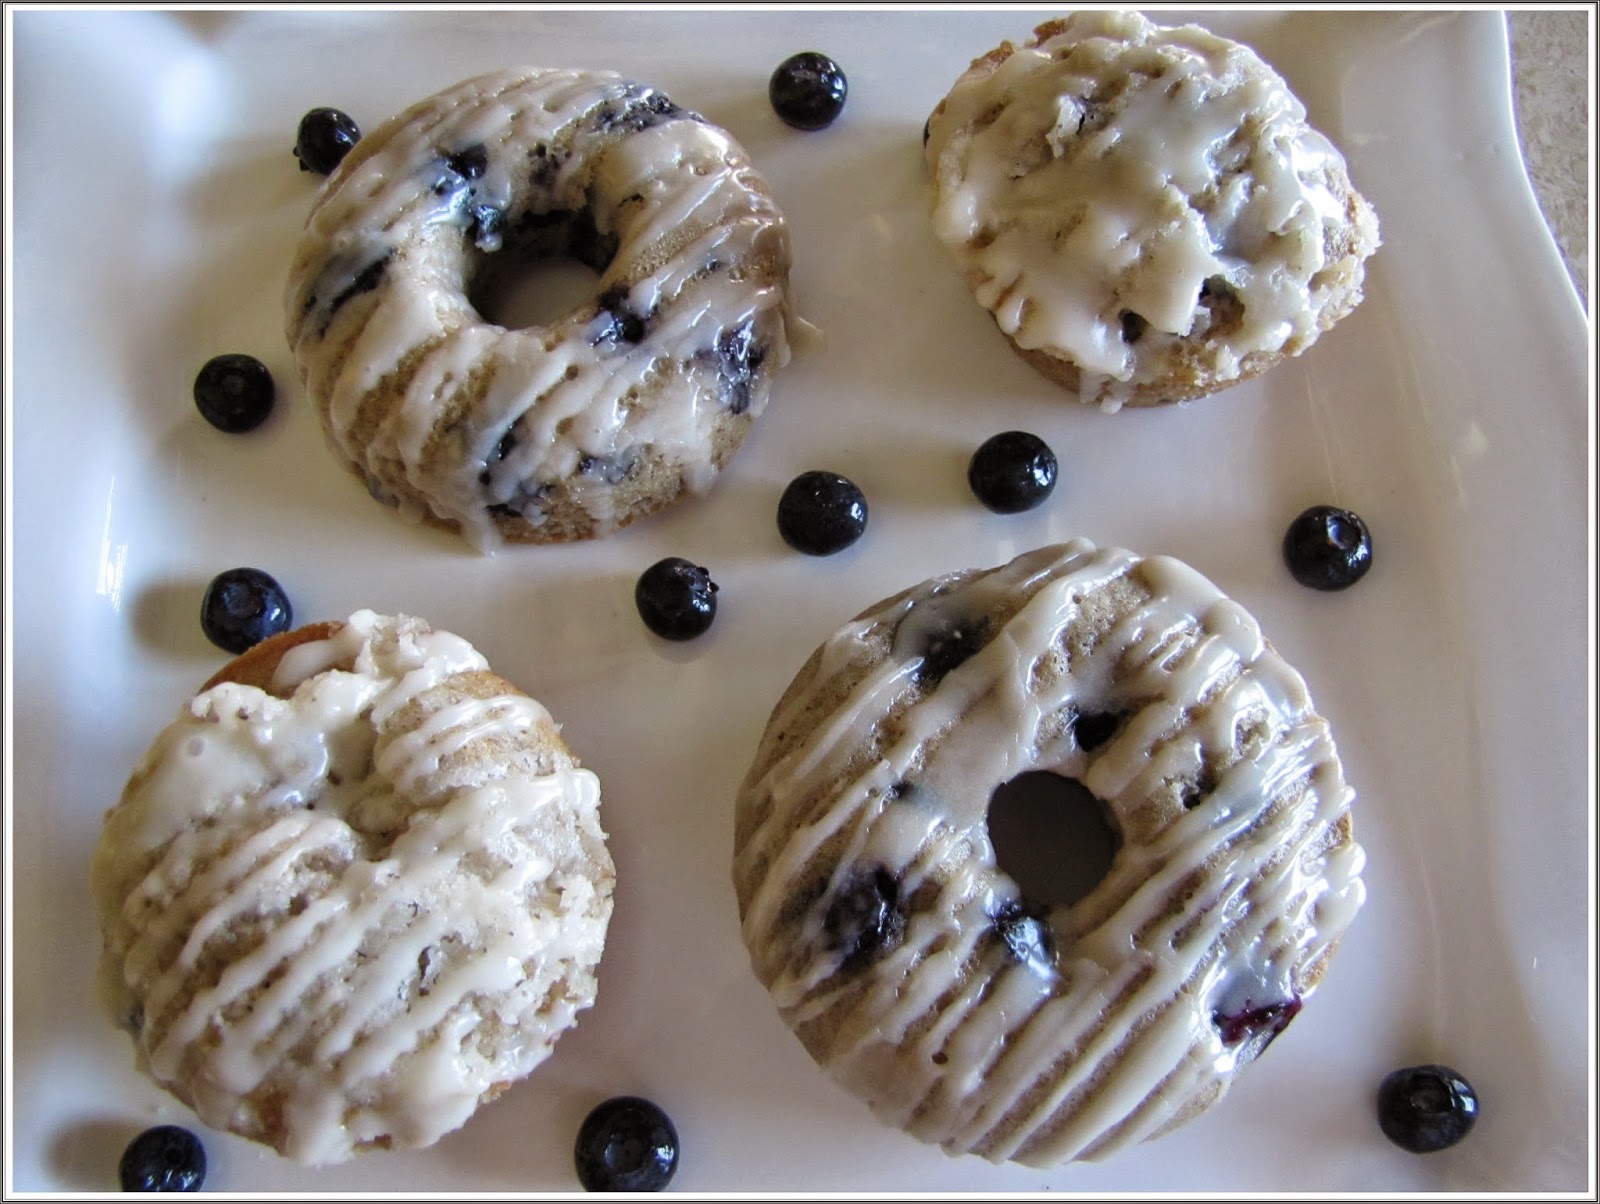
It was Sunday morning and my tummy was growling while I was catching up on my favorite cooking blog recipes on Google reader. I came across this Baked Blueberry Donut recipe from A Well-Seasoned Life and the rest is history. I had all the ingredients on hand so I ran to the kitchen and began mixing and baking. I decided to use a vanilla glaze instead of the original recipe's lemon glaze. I also made a double batch so everybody could have two with a few leftover. I only have one donut pan so I baked them in two batches and also made a few in a regular size muffin tin.
This recipe makes 6-8 donuts, depending on how big you like them, so you can easily use a donut pan or a muffin tin. I made a crumb topping for the muffins using flour, sugar, and butter, then drizzled them with vanilla glaze too.
Donut Ingredients:
1 cup all purpose flour
1/2 cup sugar
1 tsp baking powder
1/4 tsp salt
1 tsp cinnamon
2 T milk
2 large eggs
3 T canola oil
2 T water
1/2 cup blueberries
Preheat oven to 325 degrees. Spray a donut or muffin pan with non-stick cooking spray.
In a large bowl, whisk together the dry ingredients (flour, sugar, baking powder, salt, and cinnamon). In a small bowl, whisk together the wet ingredients (milk, eggs, canola oil, and water). Add the wet ingredients into the dry ingredients and stir just until combined. Gently fold in the blueberries.
Pour batter into the donut pan 2/3 of the way full. Bake for 16-18 minutes, or until puffed up and springs back to the touch.
Vanilla Glaze:
1 cup powdered sugar
1 tsp pure vanilla extract
milk, as needed for pourable glaze consistency
Invert donuts onto a cooling rack placed over a cookie sheet. Drizzle glaze over top and serve warm. Enjoy!
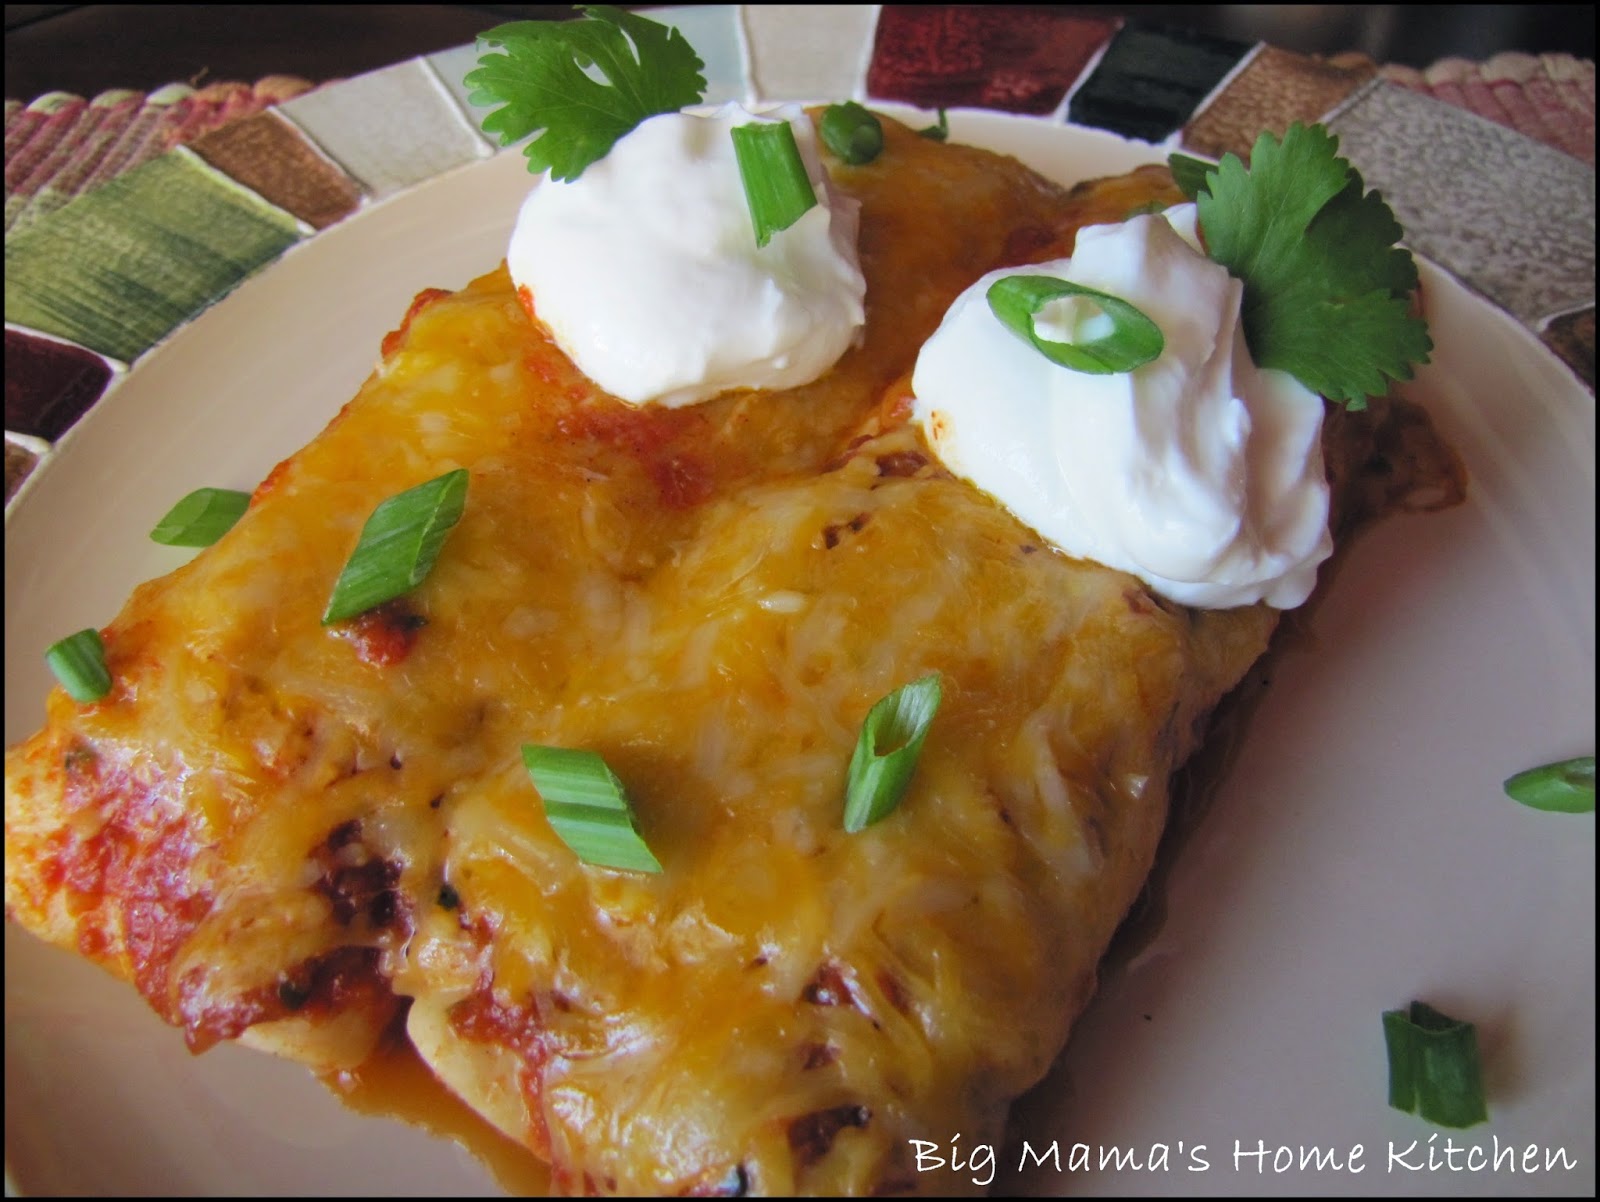
We had dinner at our neighbors house recently and she made some really good enchiladas. I tried to recreate them for our Sunday dinner, using homemade Red Enchilada Sauce. We topped them with sour cream, homemade Tex-Mex Salsa, cilantro, and green onions. My hubby wants them again next week, and my kids ate every bite on their plates!
Ingredients:
1 lb lean ground beef (93%)
1 tsp canola oil
1/4 cup yellow onion, diced
2 garlic cloves, minced
1 packet taco seasoning
3/4 cup water
black pepper, to taste
10 flour tortillas
2 cups shredded cheddar cheese, divided
cilantro
Red Enchilada Sauce
Toppings of choice: sour cream, salsa, black olives, jalepenos, shredded lettuce, cilantro, green onions
Preheat oven to 350 degrees. Spray a large cassserole dish with non-stick cooking spray.
In a large skillet over medium high heat, brown ground beef until cooked through. Add the canola oil and yellow onions and cook until onions are tender, about 5 minutes. Add the garlic and cook another minute. Stir in the taco seasoning, water, and black pepper. Cover with a lid and simmer for 8 minutes. Remove the lid and cook until liquid is absorbed. Turn off heat and let cool slightly.
Cover the bottom of the casserole dish with Red Enchilada Sauce, about 1 cup.
Assemble the enchiladas by putting some of the Beef Taco mixture, shredded cheese, and cilantro down the middle of a flour tortilla. Roll up tightly and place seam side down in casserole dish. Repeat this for all tortillas placing them side by side in the casserole dish. Top with the remaining Red Enchilada Sauce and remaining shredded cheddar cheese.
Cover with foil and bake for 15 minutes. Remove foil and bake another 5 minutes until cheese is completely melted and bubbly. Serve immediately with your toppings of choice. Enjoy!
 |
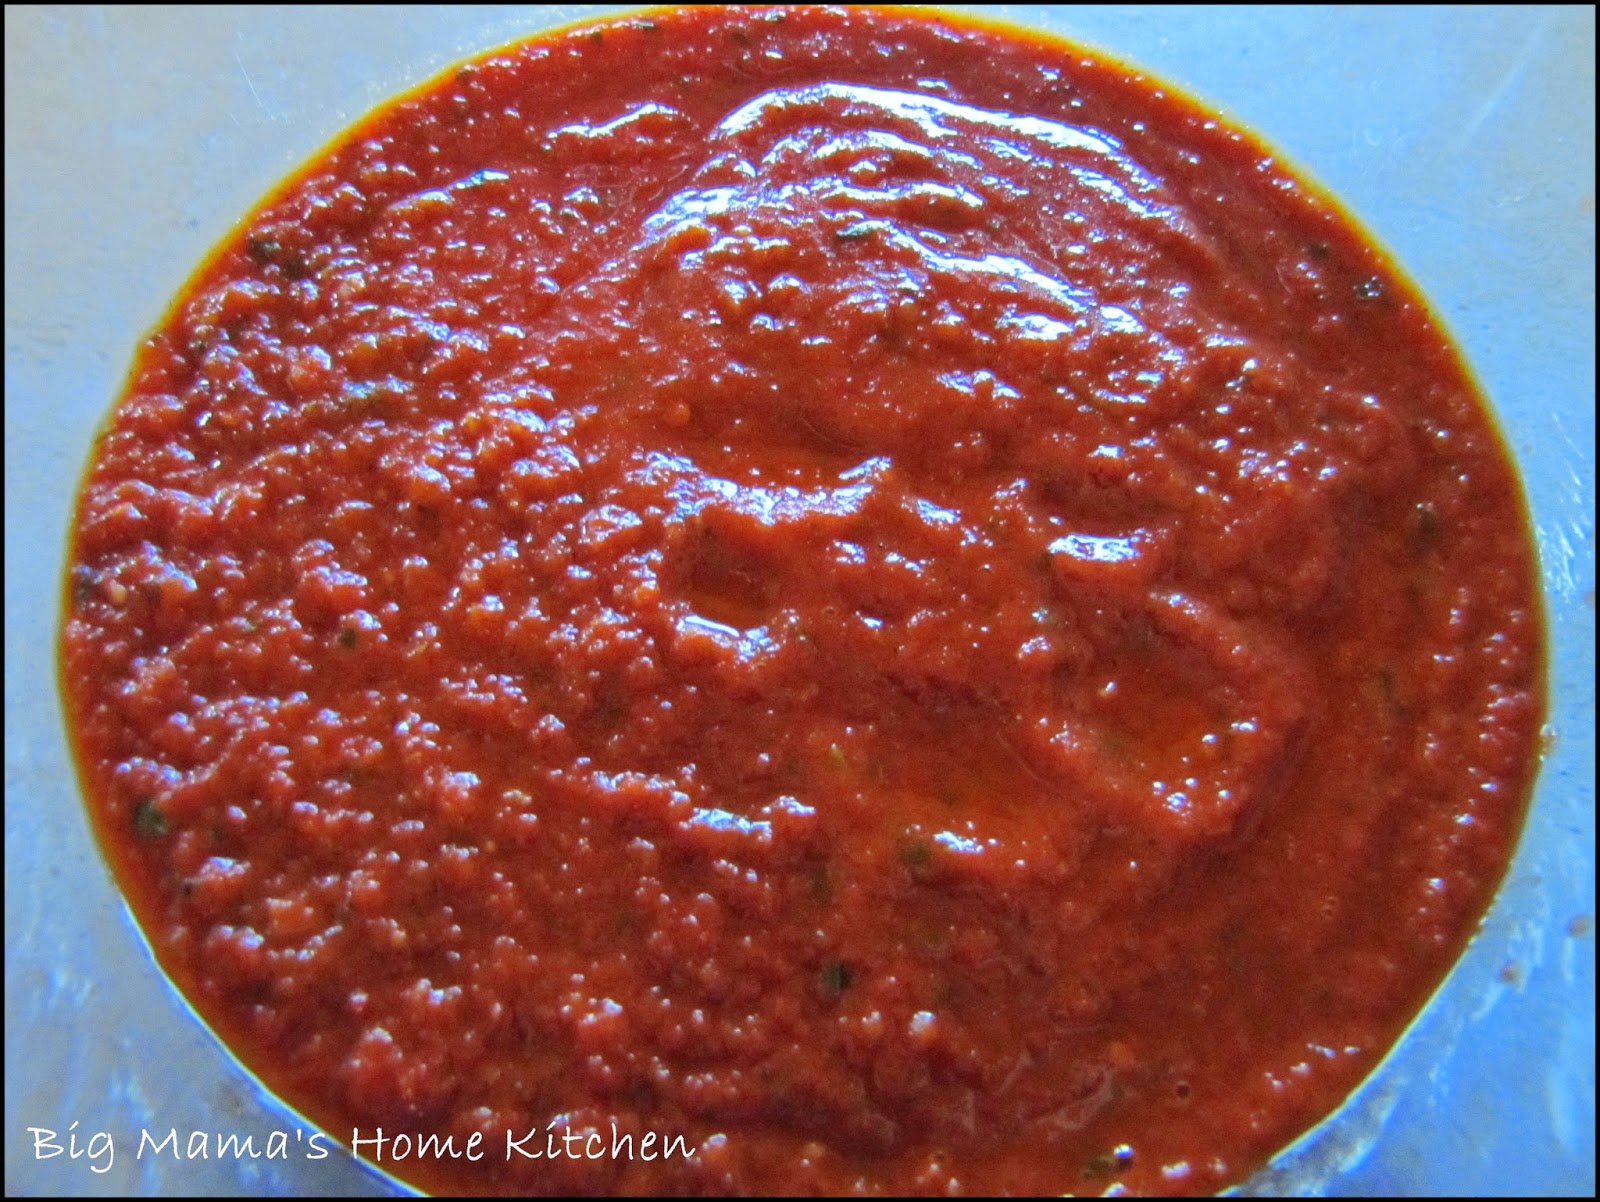
| Red Enchilada Sauce |
 |
| Tex-Mex Salsa |
My hubby wanted some enchiladas for Sunday dinner. I don't like the canned enchilada sauce so I set out to find a homemade sauce to try. I quickly found one that I had bookmarked from Pam at For The Love of Cooking. She has the most amazing recipes and I love browsing through her blog when I'm looking for something special. I topped our Beef Taco and Cheese Enchiladas with the sauce, and they were great. I will share that recipe with you tomorrow.
Ingredients:
1 T canola oil
1/2 cup yellow onion, diced
3 cloves garlic, minced
2 T chili powder
1 1/2 tsp ground cumin
1 tsp dried Mexican oregano
kosher salt
black pepper
1 - 28 oz can whole peeled tomatoes
1 tsp honey
In a medium sauce pan over medium heat, heat up the canola oil. Add the yellow onion, salt, and pepper and cook for 5 minutes. Add the garlic, chili powder, cumin, and oregano and cook for 1 minute. Crush the tomatoes by hand and add them to the pan. Add the honey and stir well. Bring to a simmer, cover, and turn heat to low. Simmer for 30 minutes, stirring occasionally.
After 30 minutes, turn off the heat and transfer to a bowl and let cool slightly. Puree in a food processor in two batches, being careful not to overfill since the liquid is hot. Use on your favorite enchiladas or Mexican dish. Enjoy!
I really enjoyed reading all your favorite summer memories. Thanks so much for stopping by and sharing your personal stories with me. The winner of the two cookbooks is:
Leslie (#36 comment) who said:
"My favorite summer memory is camping by the jetties in Mayport, Fl. watching the dolphins swimming and the sun setting over the navy ships in the basin while taps played. Beautiful!!"
Congratulations Leslie! Please email me your address: digiorno@att.net
It sounds like an amazing camping trip! We visited Florida for the first time this summer and absolutely loved it. We plan on going back every summer, but we are definitely going to fly instead of drive, or at least I am.