Showing posts with label Truffles. Show all posts

Tuesday, March 20, 2012

Cake Ball Sundae Cones


We spent St. Patrick's Day making these fun Cake Ball Sundae Cones from my new book Cake Pops Bakerella.  


We used a boxed strawberry cake mix and vanilla frosting for the cake balls, and vanilla coating for the outside.  Fun sprinkles and a skittle on top made them look so cute.  My girls loved them as you can tell from their big smiles.

Ingredients:

1 box cake mix, plus water, oil, and eggs per box instructions
1 can vanilla frosting
2 or 3 bags Wilton candy melts (I used white and pink vanilla flavor)
sprinkles and skittles

Bake cake in a 9x13 pan per box instructions.  Let cool.

Crumble cake into a large bowl, then add the frosting.  Stir well until it all comes together. Refrigerate for 30 minutes.

Roll the cake into large balls just large enough to cover the ice cream cone opening.  Freeze for 1 hour.

You will need a place to set the cones upright for the melted chocolate to set up.  I used a wire cooling rack balanced on top of two plastic cups.  You can also use some styrofoam or empty egg carton with holes punched big enough for the bottom of cone to balance without falling over.

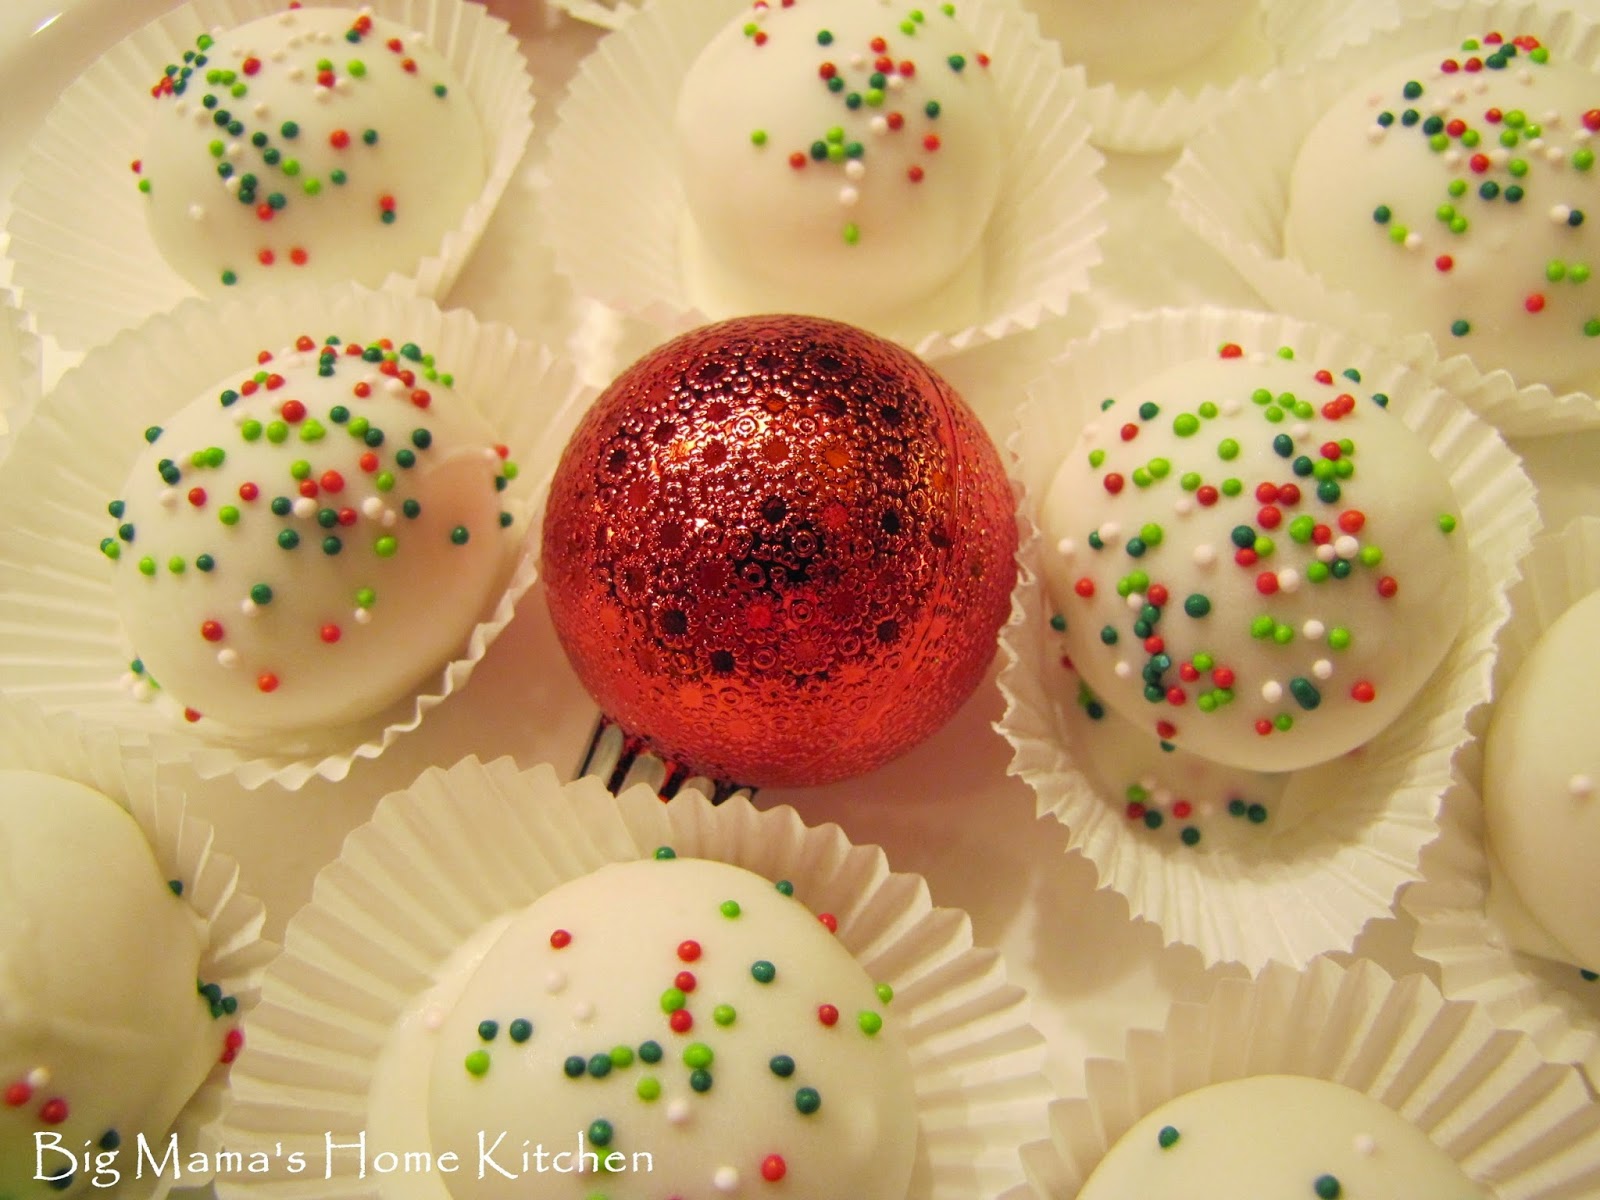
In the microwave, melt one bag of the candy melts in a deep bowl.  Dip each cake ball in the melted chocolate, then use a spoon to carefully set on top of cone.  You want the chocolate to drip down the sides of cone (this will seal it). Decorate with sprinkles. Place into your drying station so the chocolate can set up.  Repeat with all cake balls, melting more chocolate as needed.

Melt the other bag of candy melts in contrasting color.  Spoon over each dried cake ball and add a skittle on top.  Let chocolate set up.  Enjoy!

These can be stored at room temperature, but are best eaten the same day as the cones will lose their crispiness and become very chewy.

Pin It

Thursday, January 12, 2012

Cake Batter Truffles


I've made Red Velvet Cake truffles, Oreo truffles, and Peppermint Brownie truffles.  But these truffles deserve a standing ovation.  They are absolutely incredible.  Seriously, they taste like cake batter cookie dough, and who doesn't like cookie dough!  I found this recipe at Chef In Training.

I made a batch of these truffles for our Christmas Eve party.  We always have family over to hang out, eat dinner, sing Christmas songs with the kiddos, make cookies for Santa and food for his reindeer.  It was a fun night that lasted long into the am, so I bet the sugar helped us stay focused while putting together tons of toys for our girls after they went to bed.

Truffle Ingredients:

1/2 cup unsalted butter, softened
1/2 cup white sugar
1 1/2 cups all purpose flour
1 cup yellow cake mix
1 tsp pure vanilla extract
dash salt
4 T milk
2 T sprinkles

Truffle Coating:

16 oz. Vanilla flavored white almond bark, or white candy melts
Sprinkles for decoration

In a large stand mixer, beat together the softened butter and sugar.  Add the flour, cake mix, vanilla, salt, and milk and mix just until combined.  Add the sprinkles and gently stir.  Put bowl in refrigerator to chill dough for 15 minutes.

Roll dough into 1 inch balls and place on parchment lined cookie sheet.  Place in freezer for 30 minutes. 

Melt almond bark or candy melts in the microwave.  Use a spoon to dip truffles into melted chocolate and place back on parchment lined cookie sheet.  Immediately top with sprinkles.  Store truffles in refrigerator in airtight container until ready to serve.  Enjoy!

Thursday, December 22, 2011

Peppermint Brownie Truffles


Let me introduce you to my new favorite truffles...these little fudge peppermint brownie bites are dipped in milk or white chocolate and garnished with crushed peppermint candy canes.  It's not too late to add these sweet treats to your Christmas and New Year's dessert trays.  Or pack them up in a cute little tin box and surprise your neighbors and friends.


Peppermint Brownie Truffles
and


Ingredients:

1 box brownie mix plus ingredients to make, per package instructions
1/2 tsp peppermint extract
1/2 cup chocolate fudge frosting
Wilton white or milk chocolate melts or Almond Bark
Crushed peppermint candy canes

Preheat oven to 350 degrees.  Spray a 9x13 pan with non-stick cooking spray. 

Mix brownie batter per package instructions.  Pour into prepared pan and bake per package instructions.  Let cool completely.  Use a fork to break up the baked brownies.

In a large bowl, use a large spoon to mix together the brownies, peppermint extract, and frosting.  You can refrigerate the mixture to make forming the brownie balls easier.  Form brownie truffles (2 tsp) and place on wax paper lined sheet tray.  Place in freezer for at least 1 hour to set up.

Melt chocolate melts or almond bark in microwave safe bowl.  Dip each brownie truffle in melted chocolate, use a spoon to remove, place back on sheet tray, and garnish with crushed candy canes right away (chocolate firms up quickly on the frozen brownies).

Store in an airtight container at room temperature or in the refrigerator.  Enjoy!

Friday, December 17, 2010

Red Velvet Cake Truffles


At first glance, these look like the Christmas Oreo Truffles I recently made, but the inside is filled with moist red velvet cake and cream cheese frosting.


I found this recipe over at Bakerella while searching for some treats to make for some very special people at my daughters' school.  Lots of people love red velvet cake, and the red is so festive for this time of year.  These are so easy to make, but are a bit time consuming, so be prepared to spend some time in the kitchen.  Grab all your helpers in the house to roll the cake into balls.  This makes about 50 truffles, so there's plenty to share with the special people in your life.

Ingredients:

1 Box Duncan Hines Red Velvet Cake Mix
1 1/4 cup water
1/3 cup vegetable oil
3 eggs
1 tub cream cheese frosting
1 package white chocolate bark
1 package milk chocolate bark
sprinkles
chocolate chips for decorating

Preheat oven to 350 degrees.  Spray and line a 13x9 cake pan with parchment paper.

In a stand mixer, add the cake mix, water, vegetable oil, and eggs and mix on medium speed for 2 minutes.  Pour into the cake pan and bake for 35-38 minutes.  Remove from the oven and let cool completely.  It will cool even faster if you invert it over onto a large cutting board and break it apart with your hands after it's cool enough to handle.

When the cake has cooled completely, add it to a large bowl and break up into small pieces.  Add the cream cheese frosting and stir well to combine.  Put it in the refrigerator for 30 minutes. 

Line two cookie sheets with parchment paper.  Roll cake mixture into quarter size balls and lay on cookie sheet.  Continue on...and on...and on...until all the cake has been rolled.  Put them into the freezer for 1 hour to chill well.

Remove one of the cookie sheets from the freezer.  Leave the other one in there for now.  Melt half of the chocolate bark at a time in a microwave proof glass bowl and work in small batches.  Use a spoon to help you dunk it in the chocolate and tap off the excess.  Lay back on the cookie sheet, using a toothpick to help you push it off the spoon.  Decorate immediately with sprinkles (if using) because the chocolate coating dries very quickly.  Continue on until they have all been coated and decorated.  You can also melt some chocolate chips and use a plastic baggie with the tip cut to drizzle on some pretty chocolate decorations.

Have fun and enjoy! 


Saturday, December 11, 2010

Christmas Oreo Truffles


On Thanksgiving afternoon, our neighbors brought over a red glittery box full of white and milk chocolate covered goodies.  My daughters immediately wanted to dive into the white chocolate ones and I went for the milk chocolate.  So you probably guessed by now that one of them were Oreo Truffles...white chocolate.  The others were Peanut Butter Truffles, which I plan on making next week.  They were both delicious! 

After doing some research, I found these truffles everywhere on the internet.  It's always the same recipe, so it must be tried and true.  Sure enough, it tastes just like the ones our neighbors made.  They are so good and addictive!  I actually ended up making some milk chocolate covered Oreo truffles too since my FIL will be here tomorrow and he prefers milk chocolate.  I just had to try one and they were really tasty!

Did you know that Nabisco makes Holiday Oreos.  Seriously, they really do!  They have cute little wintery pictures and red creme filling.  See...


Ingredients:

1 package Oreo cookies
1 8 oz package cream cheese, softened
1 package white chocolate bark
Christmas sprinkles or other decorations

Put all the Oreos in a food processor and grind into a fine powder.  Transfer to a mixing bowl and add the cream cheese.  Mix thoroughly.  Shape into 1 inch balls.  We were able to make 30.  Place on a wax paper lined baking sheet.  Place in the freezer for 1 hour to firm up.

Melt the chocolate according to the instructions.  I used the microwave and heated it for 45 seconds, stirred, then 15 second intervals until melted.

Dip each Oreo ball into the melted chocolate.  Use a spoon to roll it around on all sides.  Remove from the bowl using a fork and tap the fork on the edge of the bowl to let the extra chocolate drip back into the bowl.  Place back on the wax paper lined baking sheet and decorate with sprinkles, as the chocolate dries quickly.  You can also wait until the white chocolate dries and drizzle some milk chocolate over the tops.  These were my favorite!

Refrigerate until ready to serve since they have cream cheese in them.  Now go share some with your neighbors and friends.  Enjoy!


Saturday, August 28, 2010

Chocolate Truffles


I was browsing through the tables of books at Garden Ridge the other day. I found some great cookbooks, including a kid's cookbook. It's the Williams-Sonoma "Sweet Treats" cookbook. My oldest picked out the chocolate truffles to make this weekend, so this is what we tackled yesterday after school. I thought they would be simple since there are very few ingredients. Was I ever wrong! They are difficult to form into perfect little round balls like you see in the gourmet chocolate stores. And our hands were a gooey, chocolately mess! They still taste good and my girls had fun making them. I made an extra batch for my husband to take to his guys at work. Tomorrow, we are making Strawberry Shortcakes from this cookbook, which happens to be my favorite!

Ingredients:

1/4 cup (1/2 stick) unsalted butter
8 ozs. semisweet chocolate bars (2 Ghiradelli bars)
1/4 cup heavy cream
1/2 tsp vanilla extract
Toppings:
Powdered sugar
Unsweetened cocoa powder
Sprinkles or jimmies
Melted milk chocolate
Melted white chocolate
Toasted, crushed nuts

Cut the butter into cubes and break the chocolate into small pieces. Place butter cubes in a saucepan and melt over medium heat. Warm through until tiny bubbles appear in the cream around the edges of the pan. Turn off the heat. Add the chocolate pieces and stir to combine until smooth and creamy. Let sit for 5 minutes, then add in the vanilla and stir. Pour mixture into small glass bowl. Cover with plastic wrap and refrigerate for 3-4 hours.

Remove from the refrigerator. Using a melon baller, scoop the chocolate mixture to make rough balls. Place each truffle on a parchment lined cookie sheet. Put them back in the refrigerator for about 15 minutes. Remove and roll into round balls. If your hands get the mixture too warm and they are melting, either wash your hands in cold water or use a ice water bath to cool them off. Roll truffles in desired toppings.

Note: If you are planning on rolling them in melted chocolate, you will need to refrigerate until really cold and firm again. When you are ready, work quickly to roll them in the melted chocolate and remove with a fork so the excess can drip back into the bowl. 

Place on the lined cookie sheet and refrigerate so chocolate can firm up. Store in an airtight container in the refrigerator until you are ready to eat them. You can freeze truffles for up to 3 months. Enjoy!
Related Posts with Thumbnails