Saturday, September 11, 2010

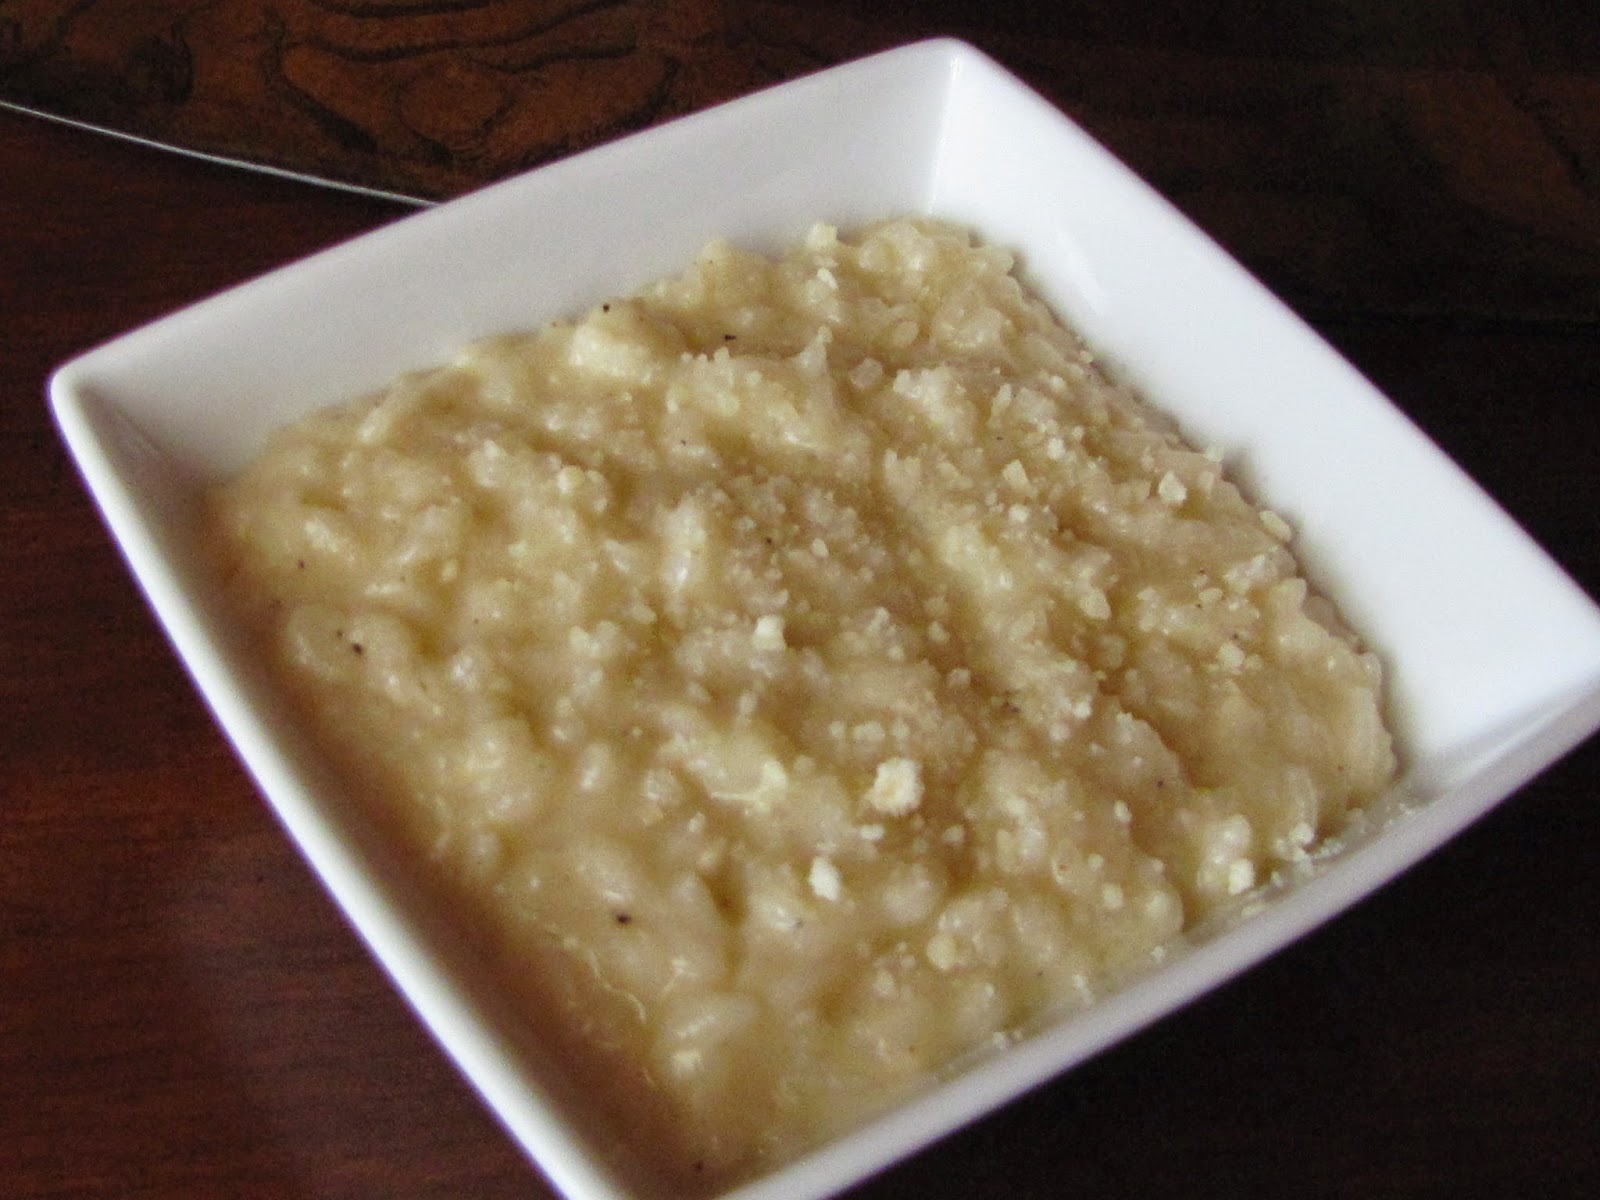
Creamy Garlic Risotto


My favorite tv chef is the sweet little Italian Giada De Laurentiis.  All of her meals look and taste delicious!  This is only the second time I've made risotto.  It's easy enough, but requires your full attention for about 45 minutes or more.  Giada's recipe says it should take about 20 minutes total, but my risotto was still too firm.  So I added even more chicken broth and kept stirring and stirring until it was tender and creamy.  Giada also uses 1/2 cup white wine with the rice on the first round of stirring, but I just prefer to use all chicken broth.  I also added lots of garlic.  Substituting roasted garlic instead of the sauteed garlic would be delicious too.  You definitely have time to roast garlic in the oven while the risotto is cooking..just stir it in at the end of the cooking process with the parmesan cheese. 

Ingredients:

7 cups reduced sodium chicken broth (give or take)
3 T butter
1 yellow onion, finely chopped
3 cloves garlic, minced
1 1/2 cups Arborio rice
1/2 cup freshly grated parmesan cheese
salt and pepper to taste

In a medium saucepan, bring the chicken broth to a simmer.  Cover the broth and keep hot over low heat.  In a large saucepan, melt 2 T butter over medium heat.  Add the onion and saute until tender, about 4 minutes.  Add the garlic and cook another minute.  Add the rice, stir, and cook 3 minutes.  Ladle in 1/2 cup of simmering chicken broth and stir until almost completely absorbed.  Add another 1/2 cup of broth and keep cooking rice while stirring.  Continue this process until the rice is tender and the mixture is creamy.  Remove from the heat and stir in the parmesan cheese, 1 T butter, and pepper.  Taste for seasoning and adjust.  Be careful with the salt since the parmesan cheese and broth are both salty.  Serve immediately...or it will become very gummy quickly.  Enjoy!

Sweet Crescent Roll Snacks


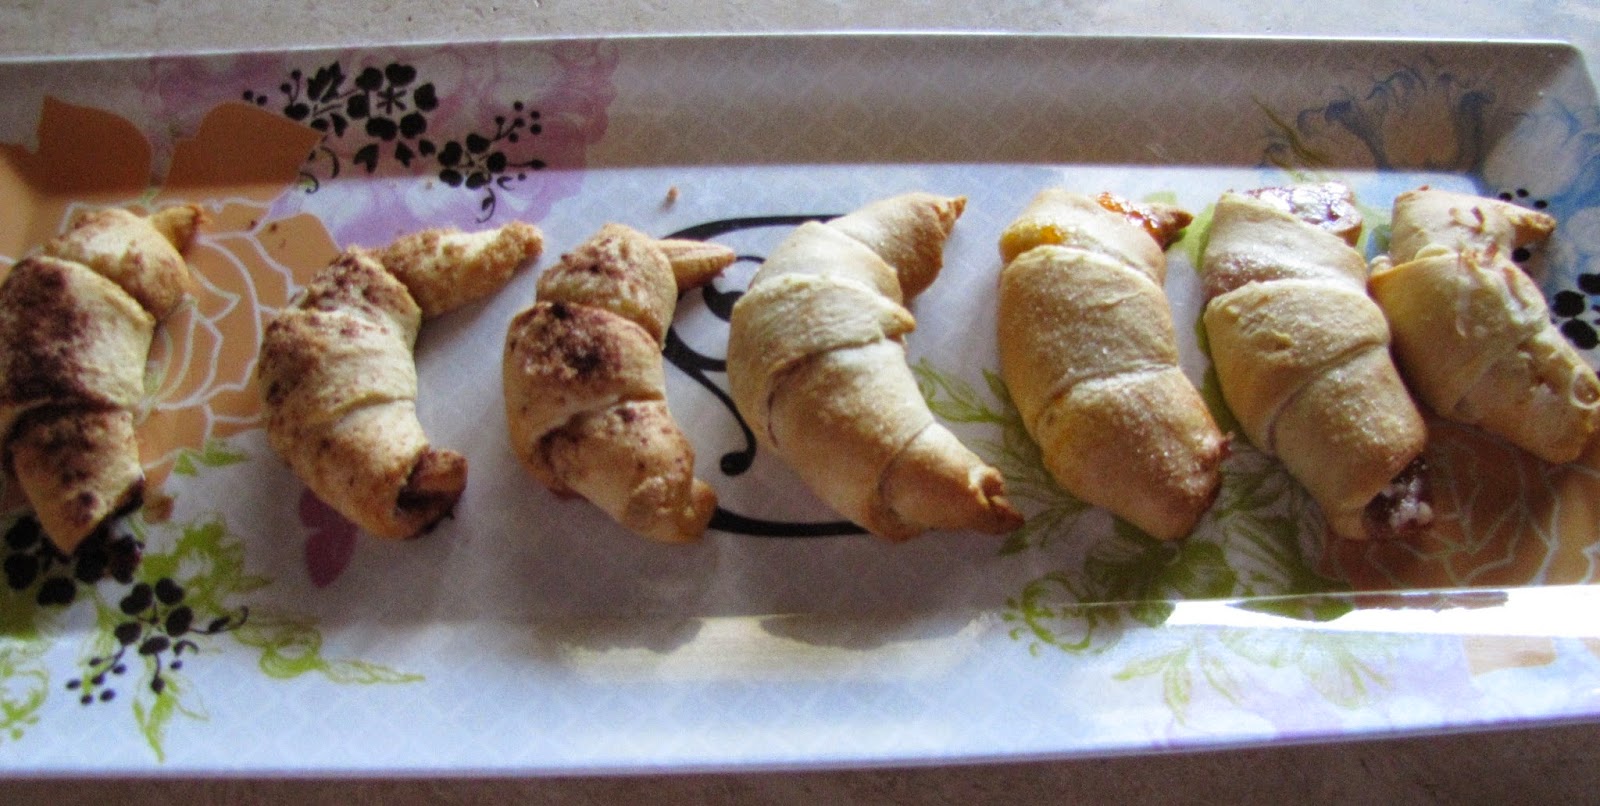
My girls are home sick today and just woke up from a nice long nap.  I wanted to make them a quick, sweet snack to help energize their sleepy little bodies.  I got the idea of stuffing store bought crescent rolls with all sorts of sweet toppings from For the Love of Cooking

You can put whatever your kids like inside.  I made several different combinations to see what we would like best for next time.  I cut them all in half and thirds so we each sample them all.

Brown sugar and cinnamon

Peanut butter and milk chocolate chips
Apricot jelly and white chocolate chips
Strawberry jelly and white chocolate chips
Coconut and white chocolate chips

                  
Ingredients:

Strawberry jelly
Apricot jelly
Shite chocolate chips
Milk chocolate chips
Peanut butter
Sweetened coconut
Cinnamon
Brown sugar

Preheat oven to 375 degrees.  Spray cookie sheet with non-stick cooking spray.  Unroll crescent rolls and line up on cookie sheet.  This way you can lay down toppings and then roll them up at one time.  Place your toppings all over crescent rolls.  Roll up from long end to triangular small tip end.  Shape into crescent.  Bake for 10-13 minutes until lightly browned on top.  Enjoy!

Thursday, September 9, 2010

Filet Mignon - Restaurant Style


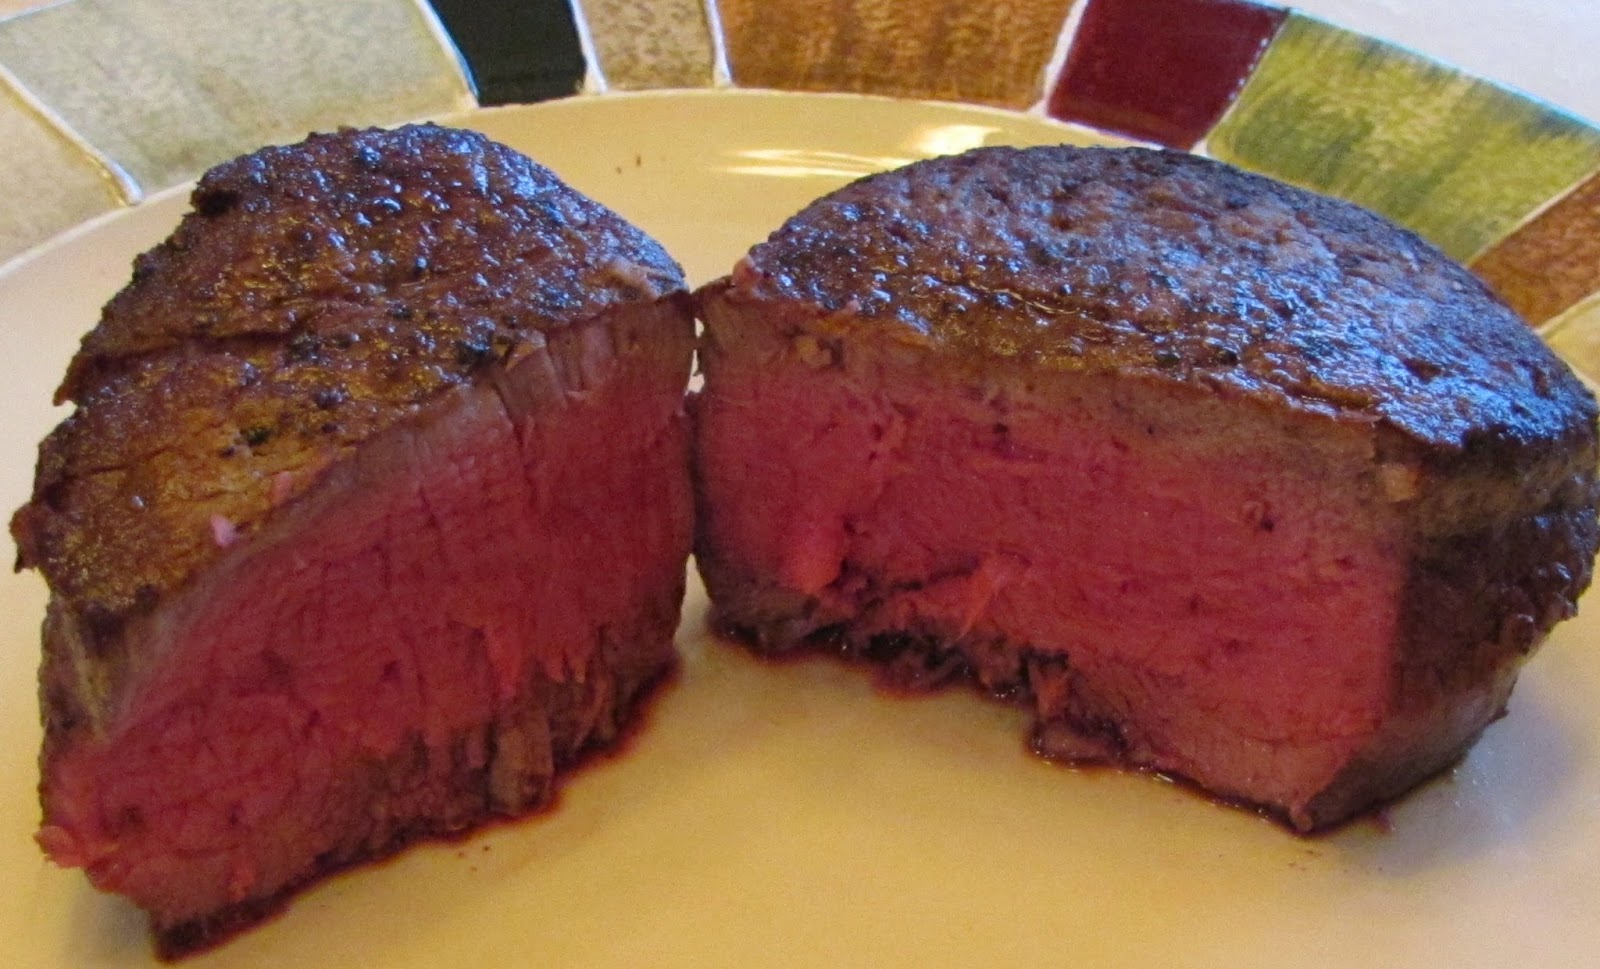
This is the way my favorite steak restaurants cook their filets.  The filets are simply seasoned with salt and pepper, seared in a smokin' hot skillet in olive oil, then finished in a very hot oven.  You will have a juicy filet with a nice crust on the outside and tender on the inside.  It will absolutely melt in your mouth.  There really isn't a recipe here...it's the technique that's important.  I served some of my country style mac 'n cheese.

Ingredients:

Filet Mignon - cut 2 inches thick
salt
pepper
olive oil

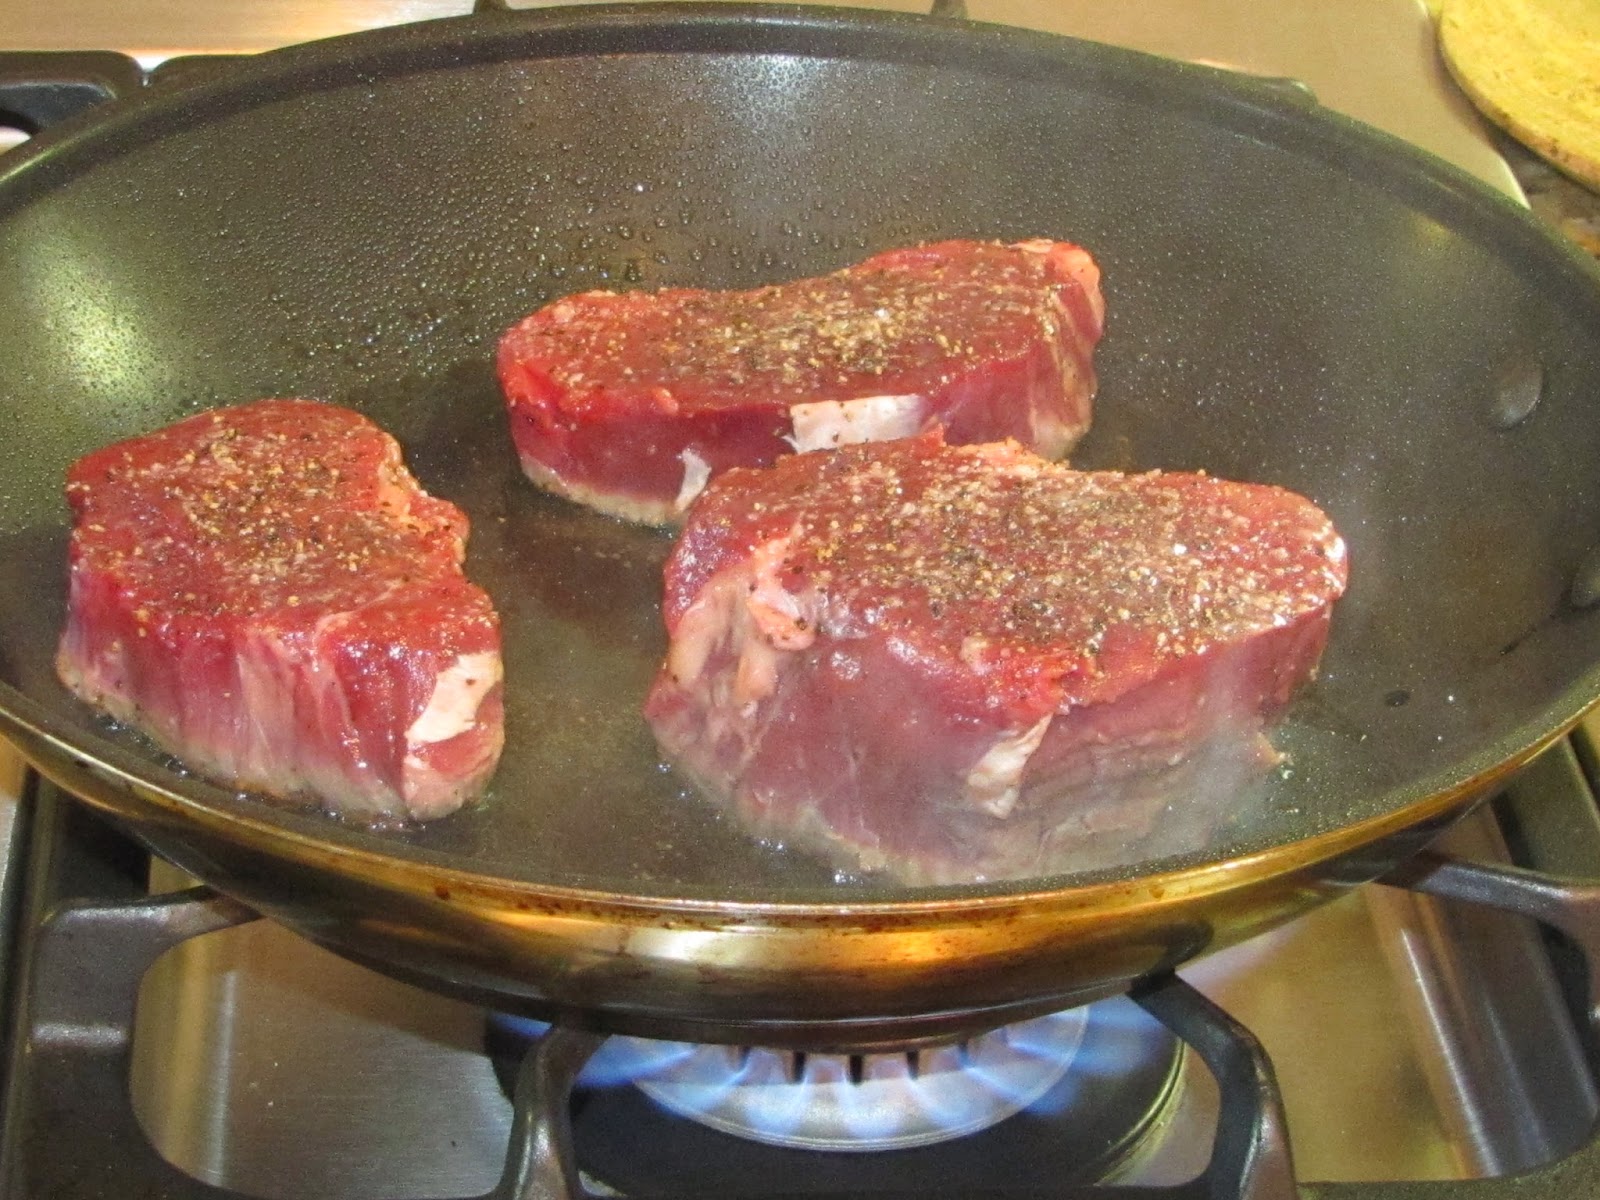
Preheat oven to 500 degrees.  In a large skillet (cast iron if you have one), heat olive oil over high heat until it starts to slightly smoke and look wavy.  Use a paper towel to dry steaks completely.  This will help give you a nice sear on the outside.  Season both sides with salt and pepper.  When your oil is ready, add the steaks to the skillet.  Cook until a nice brown crust forms.  See the smokin' hot I was talking about...


Turn steak over and put the skillet in the hot oven.  Cook until done to your likeness.  I cooked my husband's filet for 8 minutes for a true medium rare.  You can either do the poke test for doneness or insert a meat thermometer into middle to test.  Beware...when you remove the thermometer, you will lose some of the wonderful juices.  Put the steaks on a cutting board or plate to rest for 5 minutes to let the juices redistribute.  Enjoy! 


Wednesday, September 8, 2010

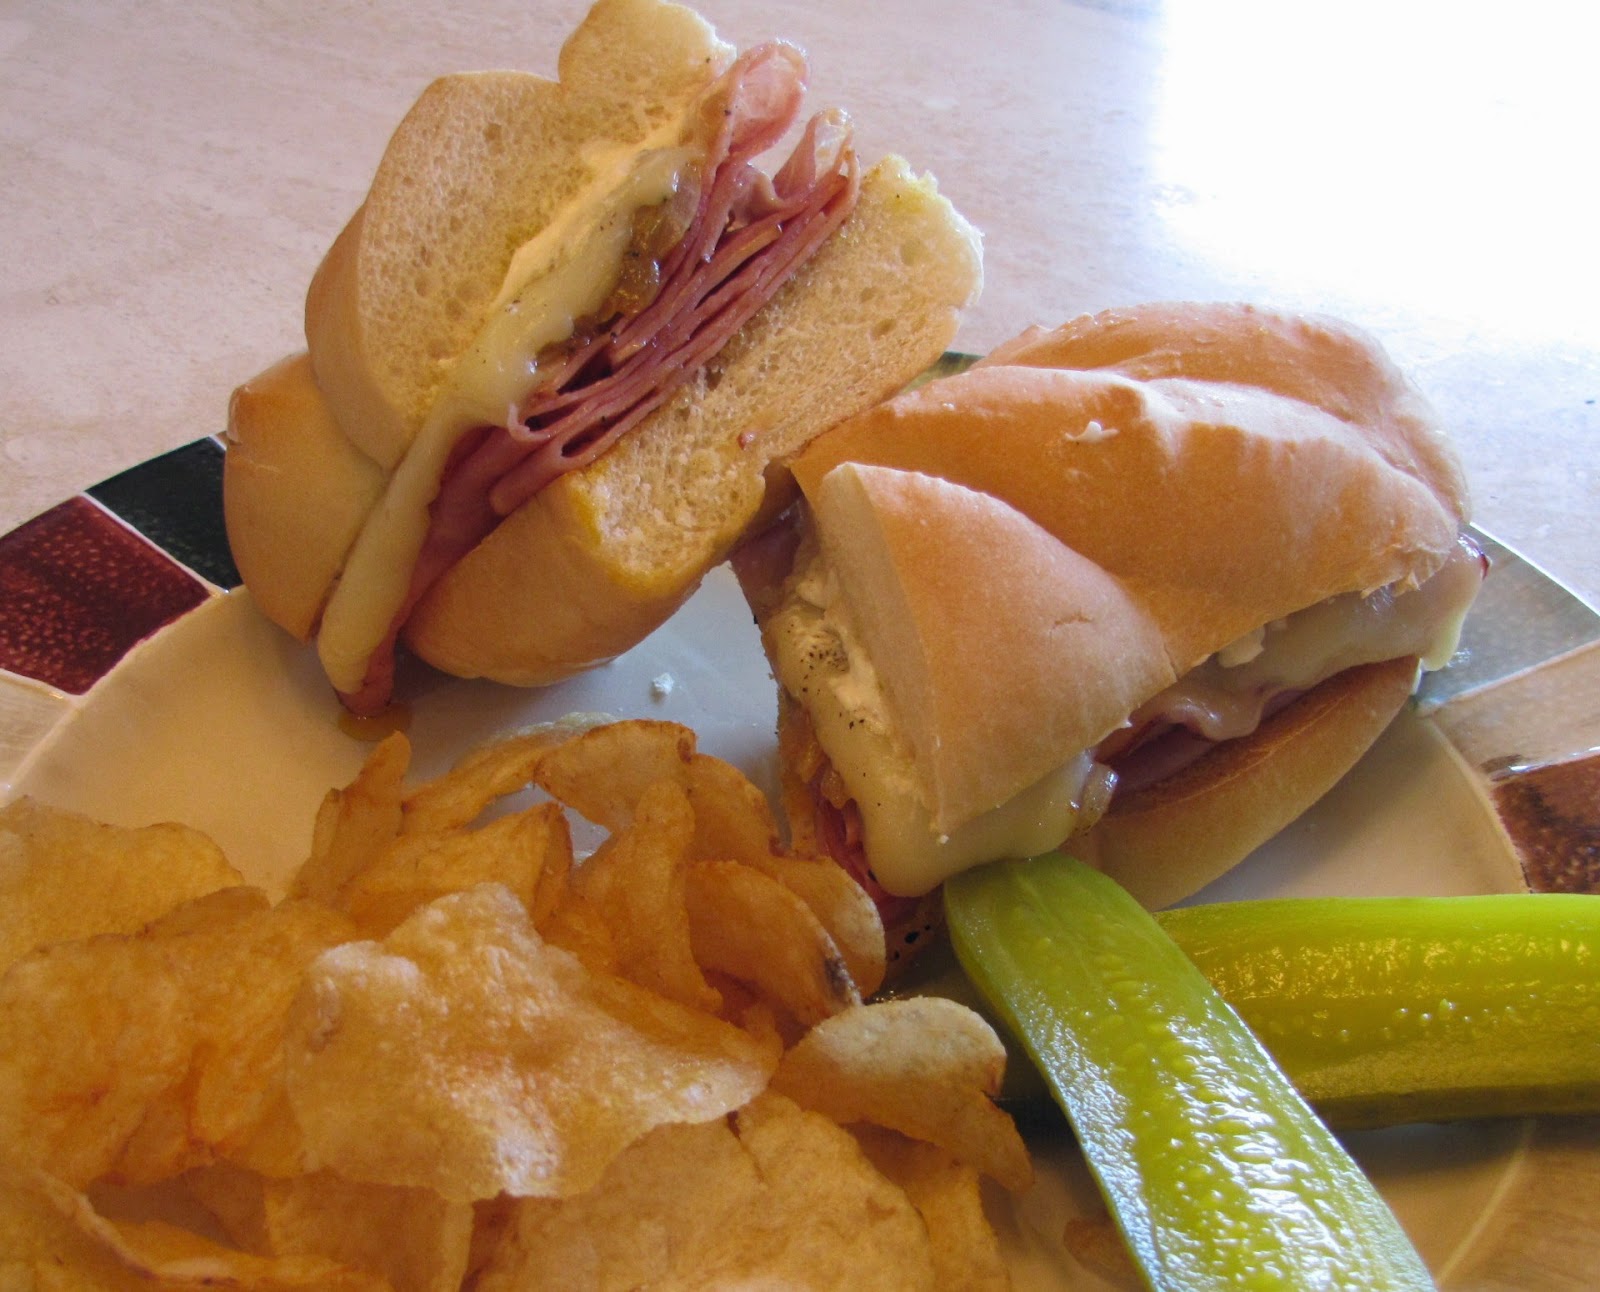
Ham, Provolone & Carmelized Onion Hoagie

Hubby's Rainy Day Lunch


It rained all last night and all this morning.  Most of the streets around our house were flooded and closed.  So instead of sending my hubby out to pick us up some take-out lunch from a restaurant, I decided to make some hot sandwiches.  You don't need a recipe for this sandwich, but here's how I made it.

Ingredients:

Slices of deli ham
Slices of provolone cheese
1/2 yellow onion, sliced into half rings
1 T butter
1 tsp olive oil
Salt
Peper
Paprika
Cayenne pepper
Garlic powder
Mayonnaise
Hoagie buns

Preheat oven broiler to 400 degrees.  

In a skillet, melt butter and olive oil over medium heat.  Add sliced onions, salt, pepper, paprika, and cayenne pepper.  Cook onions until golden brown and caramelized, about 10 minutes, stirring occasionally.  

Meanwhile, line a baking sheet with foil.  Split the hoagie buns in half.  Drizzle insides of bread with olive oil and sprinkle with garlic powder.  Broil in oven until nicely toasted, about 3 minutes.  Remove and set aside.  

When the onions are caramelized, place in a small bowl and set aside.  Put 2-3 slices of ham in same skillet.  Cook on both sides for 1-2 minutes.  I used 2 pieces of ham on my sandwich and 4 slices on my husband's.  Cook all the ham and set aside.  

Spread mayonnaise on the top half of the hoagie bun and set aside.  On the bottom half of hoagie, layer ham, caramelized onions, and provolone cheese.  Broil in oven until cheese is melted, about 3 minutes.  

Remove and assemble your sandwiches.  Enjoy!      

Monday, September 6, 2010

Taquitos 3 Ways


My husband is a HUGE Notre Dame fan!  Unfortunately, he works on Saturdays and can't watch the game live.  I always tape the game and we watch it together when he gets home from work.  He inpatiently waited until Sunday afternoon so we could watch the game with my brother.  It's too bad my husband saw the final score run across the bottom of the screen when we were watching the TCU game Saturday night! 

We needed some good snacks to go along with the big opening season game, so I made some taquitos, rotel dip, and homemade salsa.  My girls enjoyed the fruit tray with the Irish fruit dip (sorry, forget to take a picture).  You can fill your taquitos with whatever your family likes or whatever leftovers you have in the fridge.  I made chicken and cheese, steak fajita and cheese, and just plain cheese taquitos.  Once you learn the method it's easy.  This method does not involve holding them together with any toothpicks.  You can either fry them in vegetable or canola oil, or spray them with butter cooking spray and bake in the oven for a healthier version.  I fried them this time because I wanted authentic taquitos.  Enjoy!

Chicken and Cheese Taquitos

Ingredients:

Rotisserie chicken, shredded
Shredded cheese (whatever you like...I used colby jack)
Cumin
Garlic powder
Salt
Pepper
Corn tortillas
Vegetable or canola oil

In a medium sized bowl, add chicken, shredded cheese, cumin, garlic powder, salt, and pepper.  Put a tortilla on a microwavable plate and brush top side with oil, stack another tortilla on top and brush top side with oil, and repeat this process for all tortillas.  Cover with a damp paper towel.  Microwave on high for 30 seconds.  In a large skillet, pour enough oil in to cover taquitos half way for a shallow fry. Heat oil to about 325 degrees.  On your work surface, lay a tortilla down, put a row of filling across the middle, and roll up tightly.  Lay seam side down on a baking sheet until ready to fry.    You can test your oil by dipping the very end of a wooden spoon in the oil.  If small bubbles form around it, the oil is the right temperature.  Use tongs to pick up a taquito and place seam side down in the skillet.  Hold down for a few seconds to make sure seam seals together.  Cook for 1-2 minutes, then turn over to cook the other side until golden and crispy.  Remove to a paper towel lined baking sheet to drain excess oil. 

Steak Fajita and Cheese Taquitos

We cooked Carne Asada (Steak Fajitas) for dinner last night, and had some leftovers.  I decided to cook up some more taquitos for a quick lunch today using simply the steak fajita meat and shredded cheddar cheese.  The fajita meat has plenty of flavor and did not need any extra seasonings.

Cheese Taquitos

My oldest daughter prefers cheese taquitos so I cooked up some with shredded cheddar cheese.  She dipped them in sour cream since we ate all the rotel yesterday.

Arrange the cooked taquitos on a serving platter with all your favorite condiments.  We like rotel dip, sour cream, Homemade Salsa and guacamole.  Enjoy!

Linked up at Tailgating Time at The Tiny Skillet


Mexican Rice


I'm guilty of always buying the boxed/packaged rice.  The bottom line is rice intimidates me.  It is either still crunchy or too mushy when I attempt a homemade version.  I did some research and learned that the trick to the perfect rice when cooking on a stove top is to cook it with the lid on for 20 minutes over a low simmer before stirring.  It's also important to use a non-stick pan since you can't stir for 20 minutes.  It turned out perfect this time!

Ingredients:

11/2 cups long grain white rice
1 T vegetable oil
1/2 yellow onion, chopped
1/2 green pepper, chopped
1 fresh jalapeno pepper, seeded and diced
2 cloves garlic, minced
1 3/4 cups low sodium chicken broth, heated
1 cube chicken bouillon
1 small 8 oz. can Goya spanish tomato sauce
1/2 tsp ground cumin
salt and pepper to taste
2 roma tomatoes, seeded and chopped

In a medium sauce pan, cook rice in vegetable oil over medium heat for about 3 minutes.  Stir in the onion, green pepper, and jalapeno.  Saute for 5 minutes.  Add minced garlic and cook another minute.  Pour in heated chicken broth/bouillon cube mixture (I pour mine in glass measuring cup and heat it in the microwave with the chicken bouillon cube), tomato sauce, and cumin.  Bring to a boil, reduce heat to low, and cover.  Simmer on low for 20 minutes.  Do not be tempted to open and stir.  After 20 minutes, turn off the heat, remove the lid, and stir.  Cover and let sit for 10 minutes until all the liquid is absorbed.  Stir in the chopped tomato.  Taste and season with salt and pepper as needed.  Enjoy!

Chocolate Layered Cake...with Cream Cheese Frosting, Raspberries, and Chocolate Ganache


I wanted to make something special for my brother who was coming over to visit us while he was in town this weekend.  He rarely cheats on his strict diet, so this dessert better be good!  I do believe I succeeded.  He ate a huge piece with 2 scoops of vanilla ice cream (and I sent another big piece for him to enjoy later).  

I decided on this layered chocolate cake.  Raspberries and chocolate are fabulous together.  The tartness of the raspeberries cuts through the richness of the ganache.  Add in some cream cheese frosting and you have an amazing decadent dessert.  There are several steps to making this cake but it was definitely worth it!

I already shared my first chocolate cake disaster with you.  I decided to make Ina Garten's chocolate cake for the layers instead of using my original recipe.  

Chocolate Cake

Ingredients:

1 3/4 cups all-purpose flour
2 cups sugar
3/4 cup cocoa powder
2 tsp baking soda
1 tsp baking powder
1/2 tsp kosher salt
1 cup buttermilk
1/2 cup vegetable oil
2 large eggs, room temperature
1 tsp vanilla extract
1 cup freshly brewed hot coffee

Preheat the oven to 350 degrees.  Spray two 9 inch round cake pans VERY liberally with non-stick cooking spray and set aside.  Sift the flour, sugar, cocoa powder, baking soda, baking powder, and salt in a large bowl.  Whisk throughly until combined.  In another bowl, combine the buttermilk, vegetable oil, eggs, and vanilla.  Whisk to combine.  Add the wet ingredients into the dry ingredients and whisk.  Add the hot coffee and whisk.  Pour the batter into the prepared cake pans.  Bake for 25-35 minutes until the cake springs back to the touch and toothhpick comes out clean.  Cool in the pans for 30 minutes.  Turn cakes out onto a cooling rack and allow to cool completely.

While the cake bakes, you can make the chocolate ganache.

Chocolate Ganache

Ingredients:

2/3 cup heavy cream
8 ozs. semisweet chocolate bars (2 bars), broken into small pieces
pinch of salt
1 T unsalted butter, room temperature

Place broken chocolate in medium sized glass bowl.  Heat the heavy cream on the stove, bringing it to a gentle simmer.  When bubbles form around edges of pan, turn heat off.  Pour hot cream over chocolate and let sit untouched for 5 minutes.  Whisk together until smooth.  Add in the salt and butter and whisk until combined and silky.  Refrigerate until ready to assemble cake.

While the cake cools, you can make the cream cheese frosting and slice up the fresh raspberries.

Cream Cheese Frosting

8 oz. cream cheese, room temperature
2 T unsalted butter
8 oz. (1/2 pound) powdered sugar
Juice of 1/2 lemon

1 pint fresh raspberries, sliced and set aside (Reserve a few whole for decorating cake)

In a medium sized bowl, add the cream cheese and butter.  Use a hand mixer and beat until creamy.  Add the powdered sugar and lemon juice.  Beat for 5 minutes until a nice thick frosting is created.  Set aside.  Rinse and slice the fresh raspberries and set aside.

Assembly:

When the cake has cooled completely, use a long serrated knife to cut each cake in half.  Place your hand on top of the cake and carefully cut through the middle while turning the cake to make even layers. 


Lay all your layering ingredients out on the counter.  The chocolate ganache might need to soften at room temperature for about 5 minutes so it's easier to spread onto cake.  Place the bottom layer of one of the cakes on a service platter.  Spread 1/2 of the chocolate ganache evenly over cake.  Place the top cake layer over ganache.  Spread 1/2 of the cream cheese frosting over layer.  Top with sliced fresh raspberries. 


Add the bottom layer of the other cake on top.  Spread the remaining ganache over layer.  Add the remaining cake layer.  Spread the remaining cream cheese frosting on top.  You can decorate as you like.  I dusted the very top with cocoa powder and added some fresh raspberries.  Cover and refrigerate until ready to eat.  When you are ready to indulge your sweet tooth, remove the cake from the refrigerator.  Take the cover off and leave at room temperature for about 30 minutes.  Enjoy!


Saturday, September 4, 2010

BBQ Chicken Hoagie


I picked up a rotisserie chicken at the grocery store today so that I can easily make some chicken and cheese flautas tomorrow.  My daughter loves the chicken legs, so she ate them for lunch.  I shredded the remaining chicken to cut down my work tomorrow...we are having my big brother over and cooking a Mexican feast.  There was way too much chicken for 20 flautas so I decided to make myself some lunch too.  I also bought hoagie buns for my kids' lunches next week.  You seriously don't need a recipe for this, but I wanted to share it since it was so tasty.  I love BBQ chicken.  I love chicken phillys.  I didn't have time to caramelize onions, but that would have made my sandwich complete.  Here's what I did.

Ingredients:

1/4 cup shredded rotisserie chicken
Lite mayonnaise
BBQ sauce
Sweet or sour pickle slices
2 slices provolone cheese
Hoagie bun
butter

Preheat oven broiler to 400 degrees.  Split hoagie bun in half.  Lay open face on foil lined baking sheet.  Spread mayonnaise on bottom piece of bread and butter on the top piece.  On the bottom bread, layer on the chicken, BBQ sauce, pickles, and provolone cheese.  Place sandwich in the oven and watch it (it will burn quickly if you walk away).  Broil until top is slightly toasted and provolone cheese is melted.  Remove from oven and enjoy.  Like I said, caramelized onions would have been excellent on this sammy too!!! Enjoy!

Thursday, September 2, 2010

French Bread


I decided to bake up some homemade French Bread yesterday.  It was good, but needs some improvement.  It was slightly too dense and would not rise as the recipe said.  I assume this problem was because it was raining outside and extremely humid in our house.  I also should have let it rise in the oven as recommended by other bakers.  I wanted to share the picture because I'm still very proud I even accomplished an edible loaf of bread (actually 2)!!!  I made one plain loaf with just melted butter on top, and the other with melted butter, garlic powder, and ground black pepper.  My family enjoyed the plain one best...warm out of the oven and slathered with honey butter.

Any experienced bread bakers out there, please forward me some tips and tricks for bread making.  I would love some recipes to try too.  I do own a bread maker that my Mom bought me a few years ago.  Our favorite bread is sourdough, but I have no idea how to create the important "starter".  

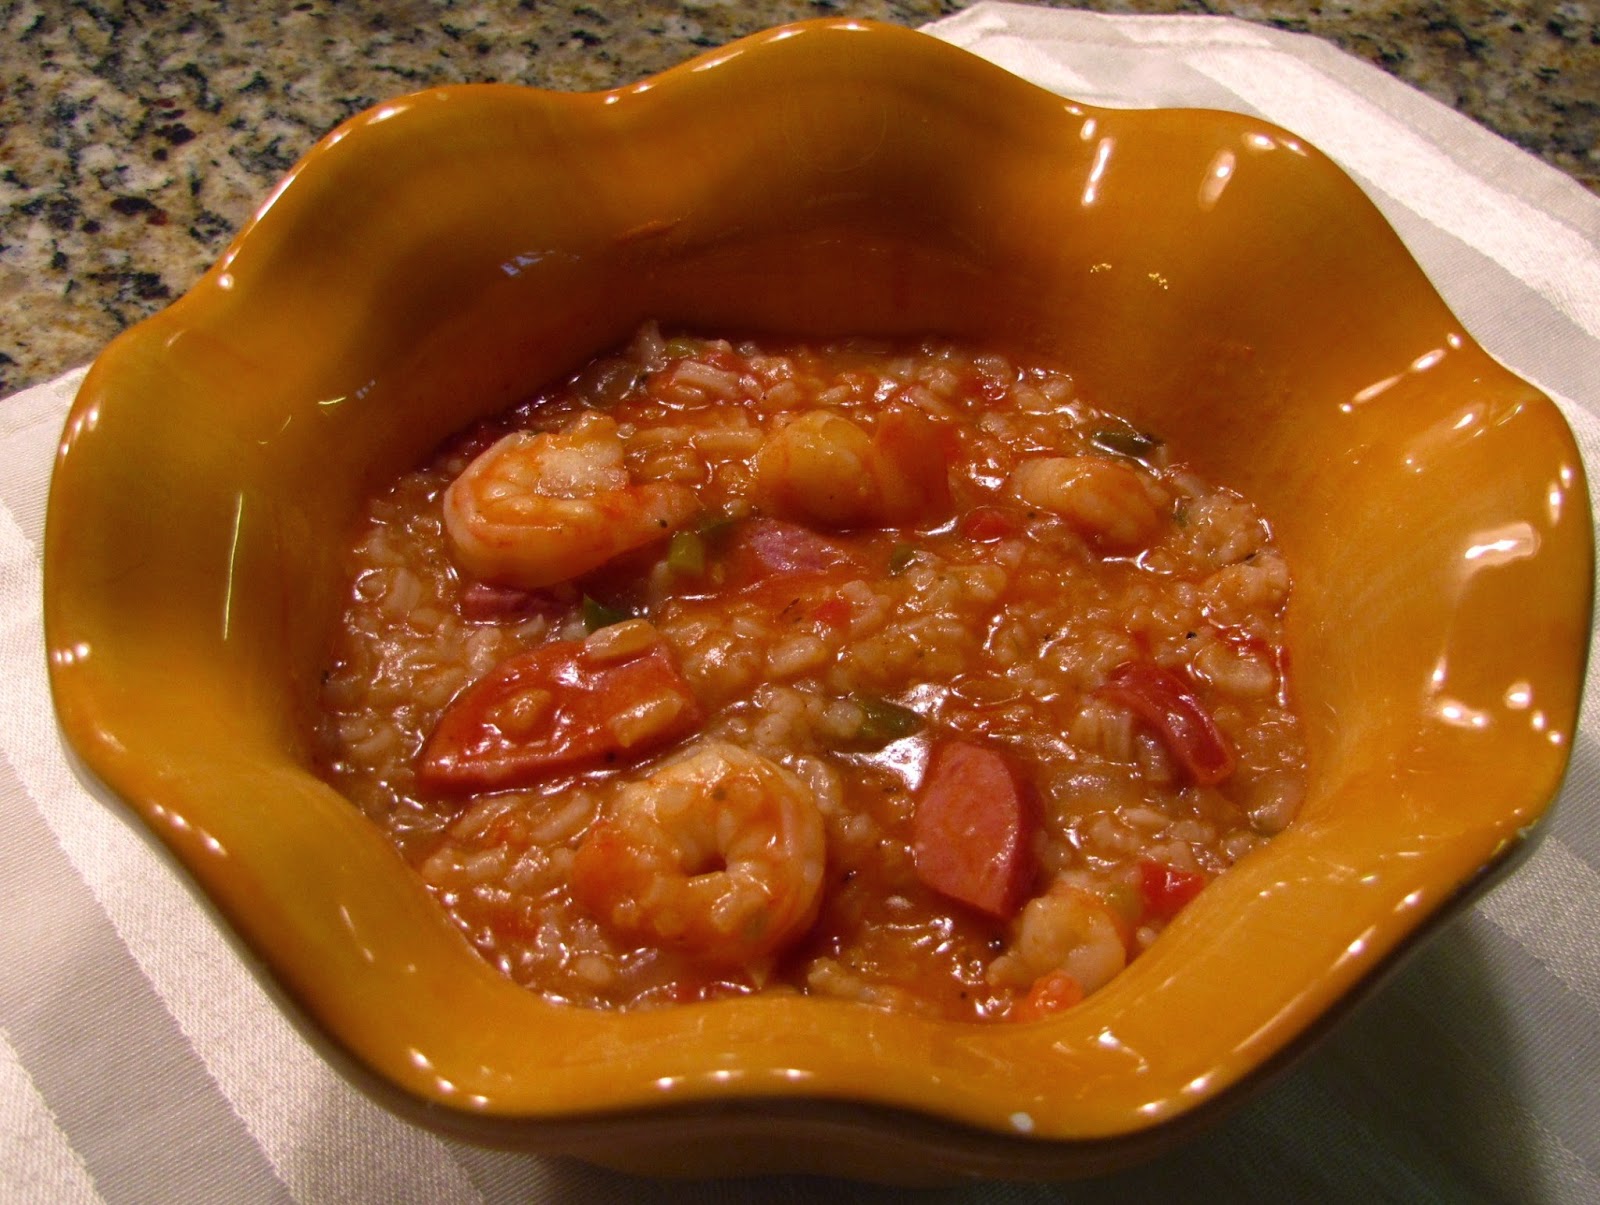
Shrimp & Sausage JambaGumbo


Yesterday was a rainy and slightly cooler day (for Texas), so what's better to warm you up than a big bowl of steaming hot jambalaya?  I make mine with a nice thick sauce so it's more like gumbo without the greasy roux, hence the name JambaGumbo.  My Madison wants all sausage in her bowl, my Taylor wants all shrimp, and my little Jordyn eats it all just like her Mom and Dad.  This is also great because you only dirty one pot so it's fast and easy cleanup.

Ingredients:

1 package Eckridge sausage, sliced into bite size pieces
1 lb large raw shrimp, peeled and deveined
1 yellow onion, chopped
1 green bell pepper, chopped
3-4 cloves garlic, minced
2 T olive oil
1 can petite diced tomatoes
3 cans low sodium chicken broth, 1/2 cup reserved
1-2 T corn starch
3 bay leaves
1 tsp dried thyme
1 tsp dried oregano
1 tsp paprika
1/4 tsp cayenne pepper
1/2 tsp garlic powder
1/2 tsp onion powder
1/2 tsp kosher salt
1/2 tsp black pepper
dash Louisiana hot sauce
1 cup uncooked long-grain white rice (NOT instant)

In a large stock pot or dutch oven, heat olive oil over medium high heat.  Add onions and green bell pepper.  Saute until soft, about 10 minutes.  Add garlic and cook another minute.  Add sausage, canned tomatoes, chicken broth (reserve 1/2 cup to thicken later), and all spices.  Bring to a boil and add the rice.  Cover, reduce heat to low, and simmer for about 20 minutes.  Stir, add shrimp, and cover.  Continue to simmer until shrimp are cooked through and opaque, about 5 minutes.  In a small cup, stir together cornstarch and remaining 1/2 cup chicken broth.  Add 1/2 mixture to jambalaya.  Stir and add more cornstarch mixture if needed to make it as thick as you like.  Taste for seasonings and adjust.  Serve with Louisiana hot sauce on the side so you can spice it up to your heat level!  Enjoy! 
Related Posts with Thumbnails